How to Unpublish a WordPress Site Without Deleting It

In my last tutorial, I showed you how to delete a WordPress site.
Today, I will show you how to unpublish a WordPress site without deleting it because sometimes you might just want to:
- Make your website private until it’s ready
- Unpublish some pages and posts (not the entire site)
- Hide some pages and posts without unpublishing them
Not premanently delete it from the internet!
So, in this tutorial, I will share 6 easy methods you can use to unpublish your site or hide certain pages and posts on your site, step by step.
Let’s get started.
How to Unpublish a WordPress Site Until You Are Ready for People to See It.
When I create websites for clients of my blog setup service, some people don’t want the site visible online until they feel ready for people to see it.
If you feel the same way, I recommend putting your site in maintenance mode and adding a coming soon page. That way, only you will see the site.
AND
You can add an email signup form to start building your email list right away.
Method 1: Add a Coming Soon Page
To add the page and put WordPress in maintenance mode, we will use a plugin called WP Maintenance mode. It’s a simple plugin, but it’s free, and it does the job.
Install and activate the plugin. If you need help with that, see my guide on how to install WordPress plugins step by step.
After activating the plugin go to Settings >> WP Maintenance Mode
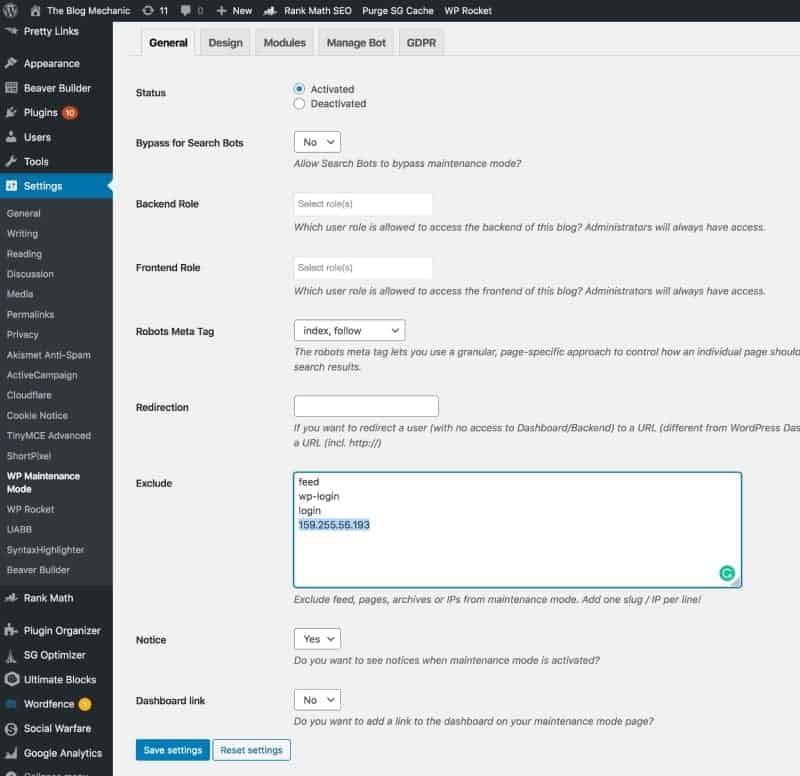
On the settings page:
- Add your IP address to the exclude list (see IP here)
- Set the status to activated
- Click the save settings button
Adding your IP address makes it possible for you to see your site even when you are not logged in to WordPress admin.
Next, to go the Modules tab.
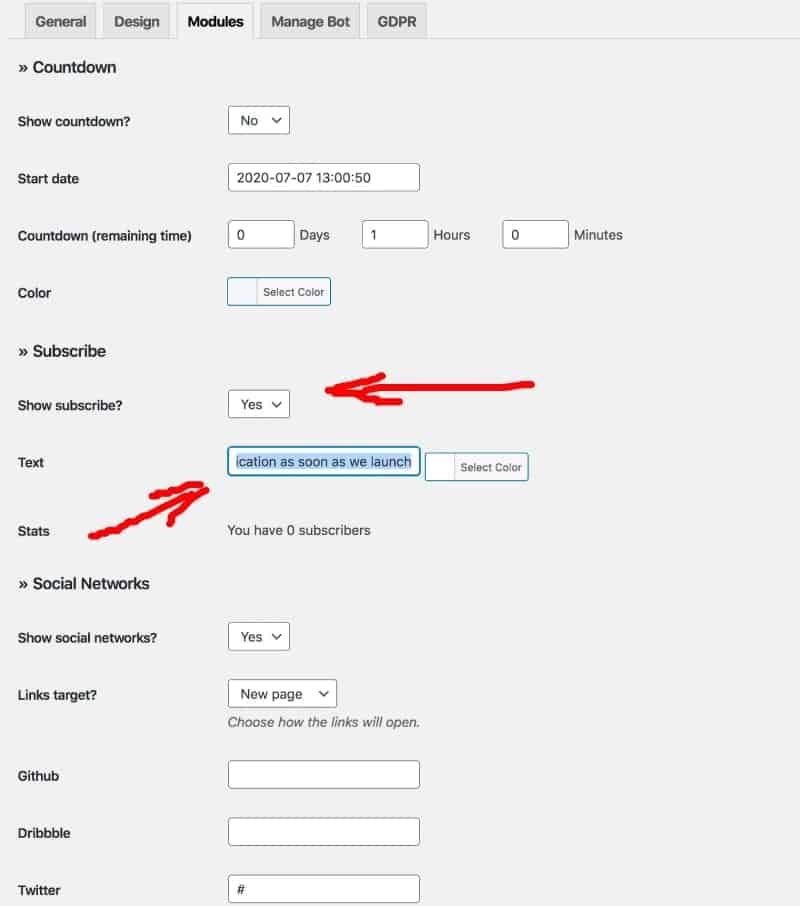
As you can see, you can show a countdown timer on the coming soon page if you have a launch date in mind, and you can add social media icons.
More importantly, though, you can add a subscription form for people to signup for email notification when you launch.
- Select ‘yes’ show subscribe
- Edit the text that shows above the form
- Click the save settings button
Note: the subscribe settings don’t integrate with any email automation service. It gives you a CSV file to export and import into your chosen service provider. If you don’t have one yet, I recommend Aweber. Click here for a free 30-day trial.
Next, switch to the design tab.
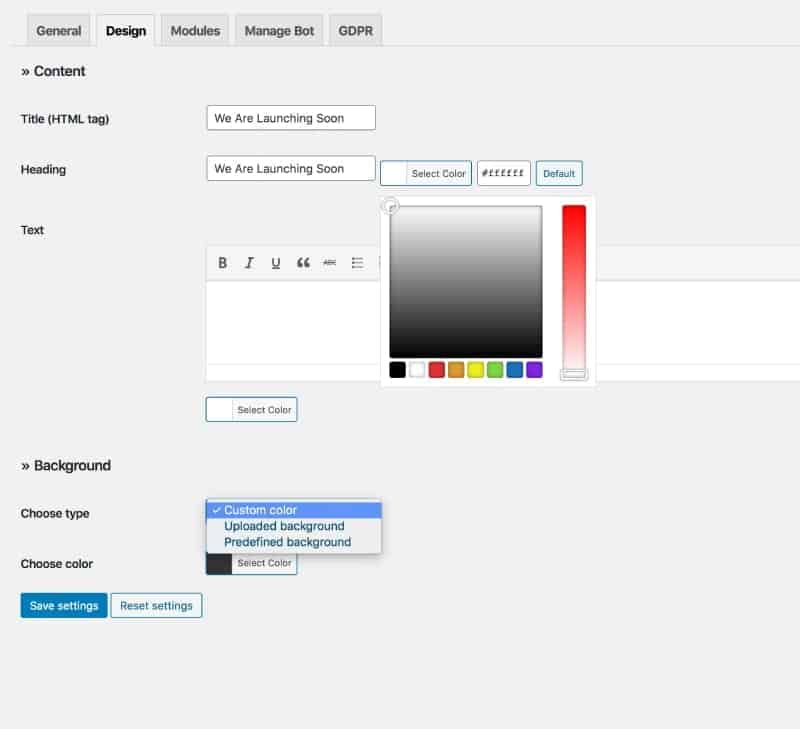
As the name suggests, this is where you can change how the page looks.
You can:
- Change the headline text
- Add description text if desired
- Change text color
- Choose a color or background image
Make your selections and then save your changes. When you’ve finished, your coming soon page will look something like this.

And that’s it. You now know how to unpublish a WordPress site until you feel it’s ready for people to read.
How to Unpublish WordPress Pages and Posts Without Deleting Them
There may be instances where you don’t need or want to unpublish a WordPress site completely. For example …
When you’ve already launched the site and people are already reading it, but there are certain pages and posts that you no longer want everyone to see.
Method 2: Unpublish Posts and Pages
You can unpublish posts and pages and put them into draft mode. When you do this, the content will be removed from your site …
And if anyone clicks a link to the unpublished page or post, or goes directly to the URL, they will see a 404 not found page.
Only you as the site owner can view the content in draft preview mode.
To unpublish a post, go to Posts >> All Posts and choose a post to unpublish.
- Change the ‘status’ to draft
- Click the update button

Now, visit your WordPress website. You’ll see that the post is no longer on the blog archive page, or anywhere else on the site.
To unpublish pages, do the same. But this time go to Pages >> All Pages.
How to Hide WordPress Pages and Posts Without Unpublishing Them
You may have pages and posts on your site, not every website visitor should see.
For example:
- Thank you pages
- Confirmation pages
- Instructional pages
- Download pages
- Premium Posts
These are important pages and posts that subscribers and customers only get access to, so you can’t unpublish them. You need to hide or protect them instead.
There are a few different ways to achieve this depending on your needs.
Method 3: Noindex Pages
Pages are only seen by website visitors if you add them to the navigation menu.
But Google still indexes them and shows them in the search results. So, people can still find them and visit the pages you don’t want everyone to see.
To hide important pages like confirmation, thank you, instructional, and download pages, you should noindex them so they are not shown in Google search.
You can easily noindex a page or post using a free SEO plugins link Yoast SEO and RankMath. Below I am using Rank Math.
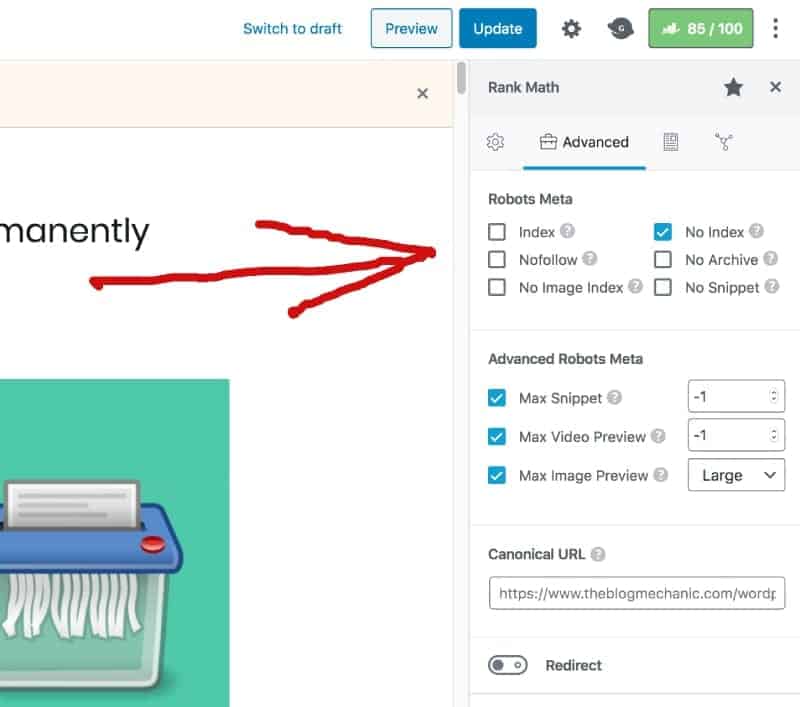
If you’re using the Yoast SEO plugin, this tutorial shows you how to noindex.
Method 4: Hide Posts With a Plugin
Note: if the posts you are wanting to hide are premium posts only for paying customers, then you should also noindex them following the steps above.
Want to hide a blog post but not unpublish it so people with a URL can see read it? You can use a plugin called WordPress Hide Posts.
With this plugin, you can hide posts everywhere on your site, or in specific locations only if that’s your goal.
Including:
- Homepage
- Category page
- Search page
- Tags page
- Authors page
- RSS feed
- Date archive
- Blog page
- Post navigation
However, since this is a guide on how to unpublish a WordPress site, we’ll use it to hide posts everywhere on the site.
First, install and activate the plugin. See my guide on how to install WordPress plugins if you are new to installing plugins.
Once activated, go to any post that you’d like to hide and you’ll see a new section in the Gutenberg block editor named Hide Post.
If you’re using the classic WordPress editor, the new section will be found underneath the text area.

To hide the post everywhere, select all the options, and save your changes. Then, check your site. The post should no longer be visible.
BUT don’t forget …. if someone visits the post URL directly they can see it. To make sure it cannot be found in Google search, you should noindex the post page.
Method 5: Mark Posts and Pages as Private
When you mark a post or page as private, only logged-in ‘editor and admin’ users can see it on your WordPress site.
If non logged in users visit the URL directly, they will see a 404 error page. And Google doesn’t index private pages and posts, so YOU don’t have to noindex them.
To make a post private, open the post editor.
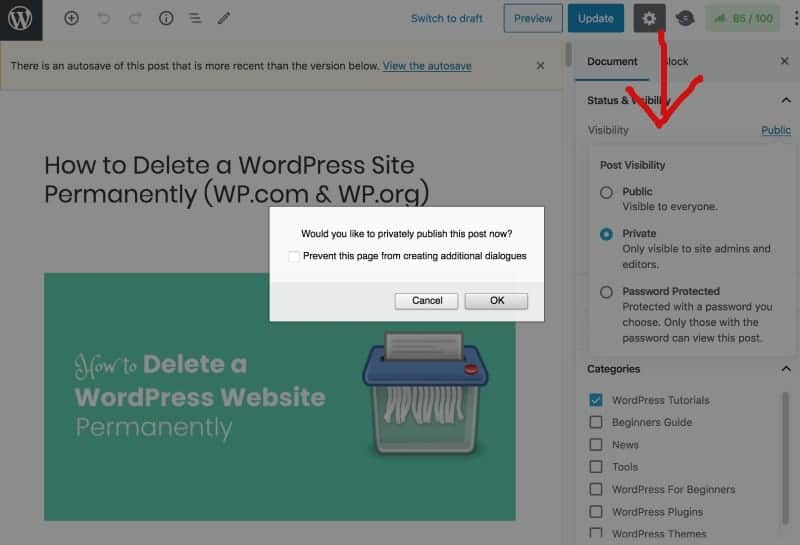
- Click the ‘public’ link next to visibility
- Select private
- Click OK to confirm
- Update the post
To make a page private, open the page editor instead and follow the same steps.
Method 6: Password Protect Pages and Posts
You can also password protect a page or post. This method won’t hide the page or post from your site, but people will need to enter a password to view it.
Go to the editor for the post or page you want to protect.

- Click the ‘public’ link next to visibility
- Select password protected
- Enter your desired password
- Update the post
And that’s it! From now on, only people with the password can view it.
Conclusion
I hope this tutorial has helped you learn how to unpublish a Wordress site.
I have shared 6 easy methods to achieve this.
If your site is brand new and you don’t want anyone to see it before you launch, the first method is best for you.
But if you just want to unpublish or hide select posts and pages on your site, take a look at methods 2 through 6 and choose the one that best fits your needs.
If you have any additional tips to share on how to unpublish a WordPress site, let me know in the comments below.
And if you found this tutorial helpful, kindly share it on social media.