How to Install WordPress Plugins Step by Step

After installing WordPress, you’ll need to know how to install WordPress plugins.
In my opinion, plugins are THE reason why WordPress is such a popular blogging platform, with more than 30 percent of website owners using it.
Plugins make it easier for non-techie users to add new website features like rotating testimonials, social sharing, sign up forms, etc
Whatever features you want to add to your blog, chances are, there’s a WordPress plugin to help you do it.
In this step by step guide for beginners, I will show you how to install WordPress plugins.
Who Can Install WordPress Plugins?
Only WordPress.org users can install plugins. WordPress.com users cannot.
That’s why, if you’re blogging for business, you should use WordPress.org, not WordPress.com
Of course, there are other reasons why using WordPress.com is a bad idea like not being able to monetise your blog in the ways you want to …
…and WordPress will delete your site without prior warning or explanation if they feel you’re breaking their terms of service – intentionally or not.
That said, WordPress.com users can now install plugins IF you upgrade to the business plan which will cost you $300 a year.
Personally, I don’t see why anyone would pay $300 a year, when WordPress.org lets you install any plugin you want for free.
Granted, with a self-hosted WordPress.org blog, you have to pay for your own web hosting, but even so, you can get web hosting with Bluehost for almost half the price at just $190 ish for 36 months. I’ll let you do the maths. 🙂
How To Install WordPress Plugins
If you learn best with video, watch the video below.
But if you prefer to follow text instructions, keep reading.
Either way, I will show you how to install WordPress plugins using WordPress plugin search, using the WordPress plugin uploader, and manually via cPanel.
How to Install a Plugin Using WordPress Search
This method is the easiest way to install free plugins from the WordPress.org plugin repository.
To get started, login to WordPress. Go to Plugins >> Add New

As seen in the screenshot above, to find the plugin you want to install, enter the plugin name in the search input field, top right corner of the screen.
If you don’t know exactly which plugin you need to install, but you know what you want the plugin to do, enter a keyword based on the website functionality that you need. For example, WordPress Speed.
After that, WordPress will show you a list of plugins based on the keyword you entered. In most cases, when searching for a plugin name, the plugin you want to install will be first on the list. Just like you can see in the screenshot above.
Whichever plugin you want to add to your site, click the Install Now button.
WordPress will then install the plugin for you. Once installed, the Install Now button will change to a blue button that says Activate, like this.

Now, go ahead and click the Activate button to activate the plugin on your WordPress website.
And that’s it.
That’s how you install WordPress plugins using WordPress plugin search.
After installing and activating the plugin, one of two things will happen. A new tab will be added to the left navigation panel, or you’ll see a new tab for the plugin under the settings menu.
How to Install a Plugin Using The Plugin Uploader
This method is generally used to install premium WordPress plugins that you have purchased such as Thrive Leads, which is an awesome plugin that you can use to build your email list.
To get started, you’ll need to download the zip file for the premium plugin you want to install. Login to your WordPress admin area and go to Plugins >> Add New. Then, click the Upload Plugin button, at the top of the page.

Clicking the Upload Plugin button will expand the plugin uploader as you can see in the screenshot below. Click Browse and select the plugin zip file you downloaded earlier. Once selected, click Install Now.

WordPress will now upload and install the plugin. Once installed, you will see a success message, like this.
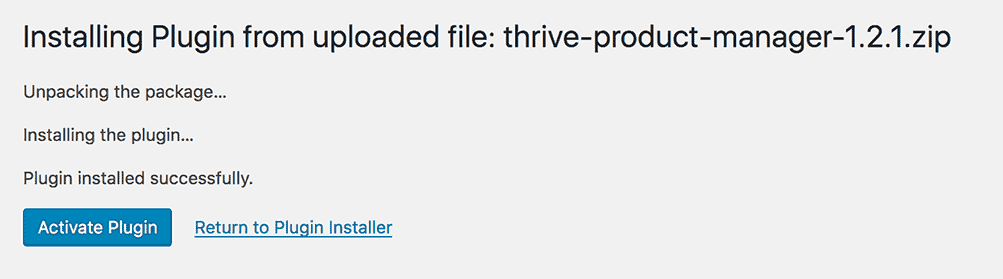
To start using the plugin, click the Activate Plugin button.
And that’s it.
That is how you install WordPress plugins using the WordPress Plugin Uploader.
After installing and activating the plugin, one of two things will happen. You’ll either see a new tab for the plugin in the left side navigation menu, or you’ll find a new tab under Settings.
How to Install WordPress Plugins Manually Using cPanel
If you’re on a shared server, in most cases, your web host will limit the file size of plugins and other files types that you can upload to WordPress from the admin area.
In which case, you’ll need to install WordPress plugins manually using cPanel. You can also use FTP, but I always find cPanel works much faster.
To get started, first you need to download the zip file for the plugin you are wanting to install.
Then, you need to login to your web hosting account cPanel area. If you do not know how to login to cPanel, contact your web hosting provider and ask them.
Once logged into cPanel, go to file manager.

For the purposes of this tutorial, I am using cPanel inside Bluehost. There may be a few differences between Bluehost cPanel and the cPanel you are using, but you should still be able to follow along.
Once you’re inside the file manager, you need to go to the directory where WordPress is installed. This is usually in the ‘public html’ folder, unless you have more than one WordPress website installed.

After that, on the right side of the screen where all the WordPress files and folders are, double click the wp-content folder to open it, then double click the Plugins folder.
Once you’re inside the Plugins folder, next, you need to upload the plugin zip file that you downloaded earlier. To do that, first click the Upload link at the top of the screen.

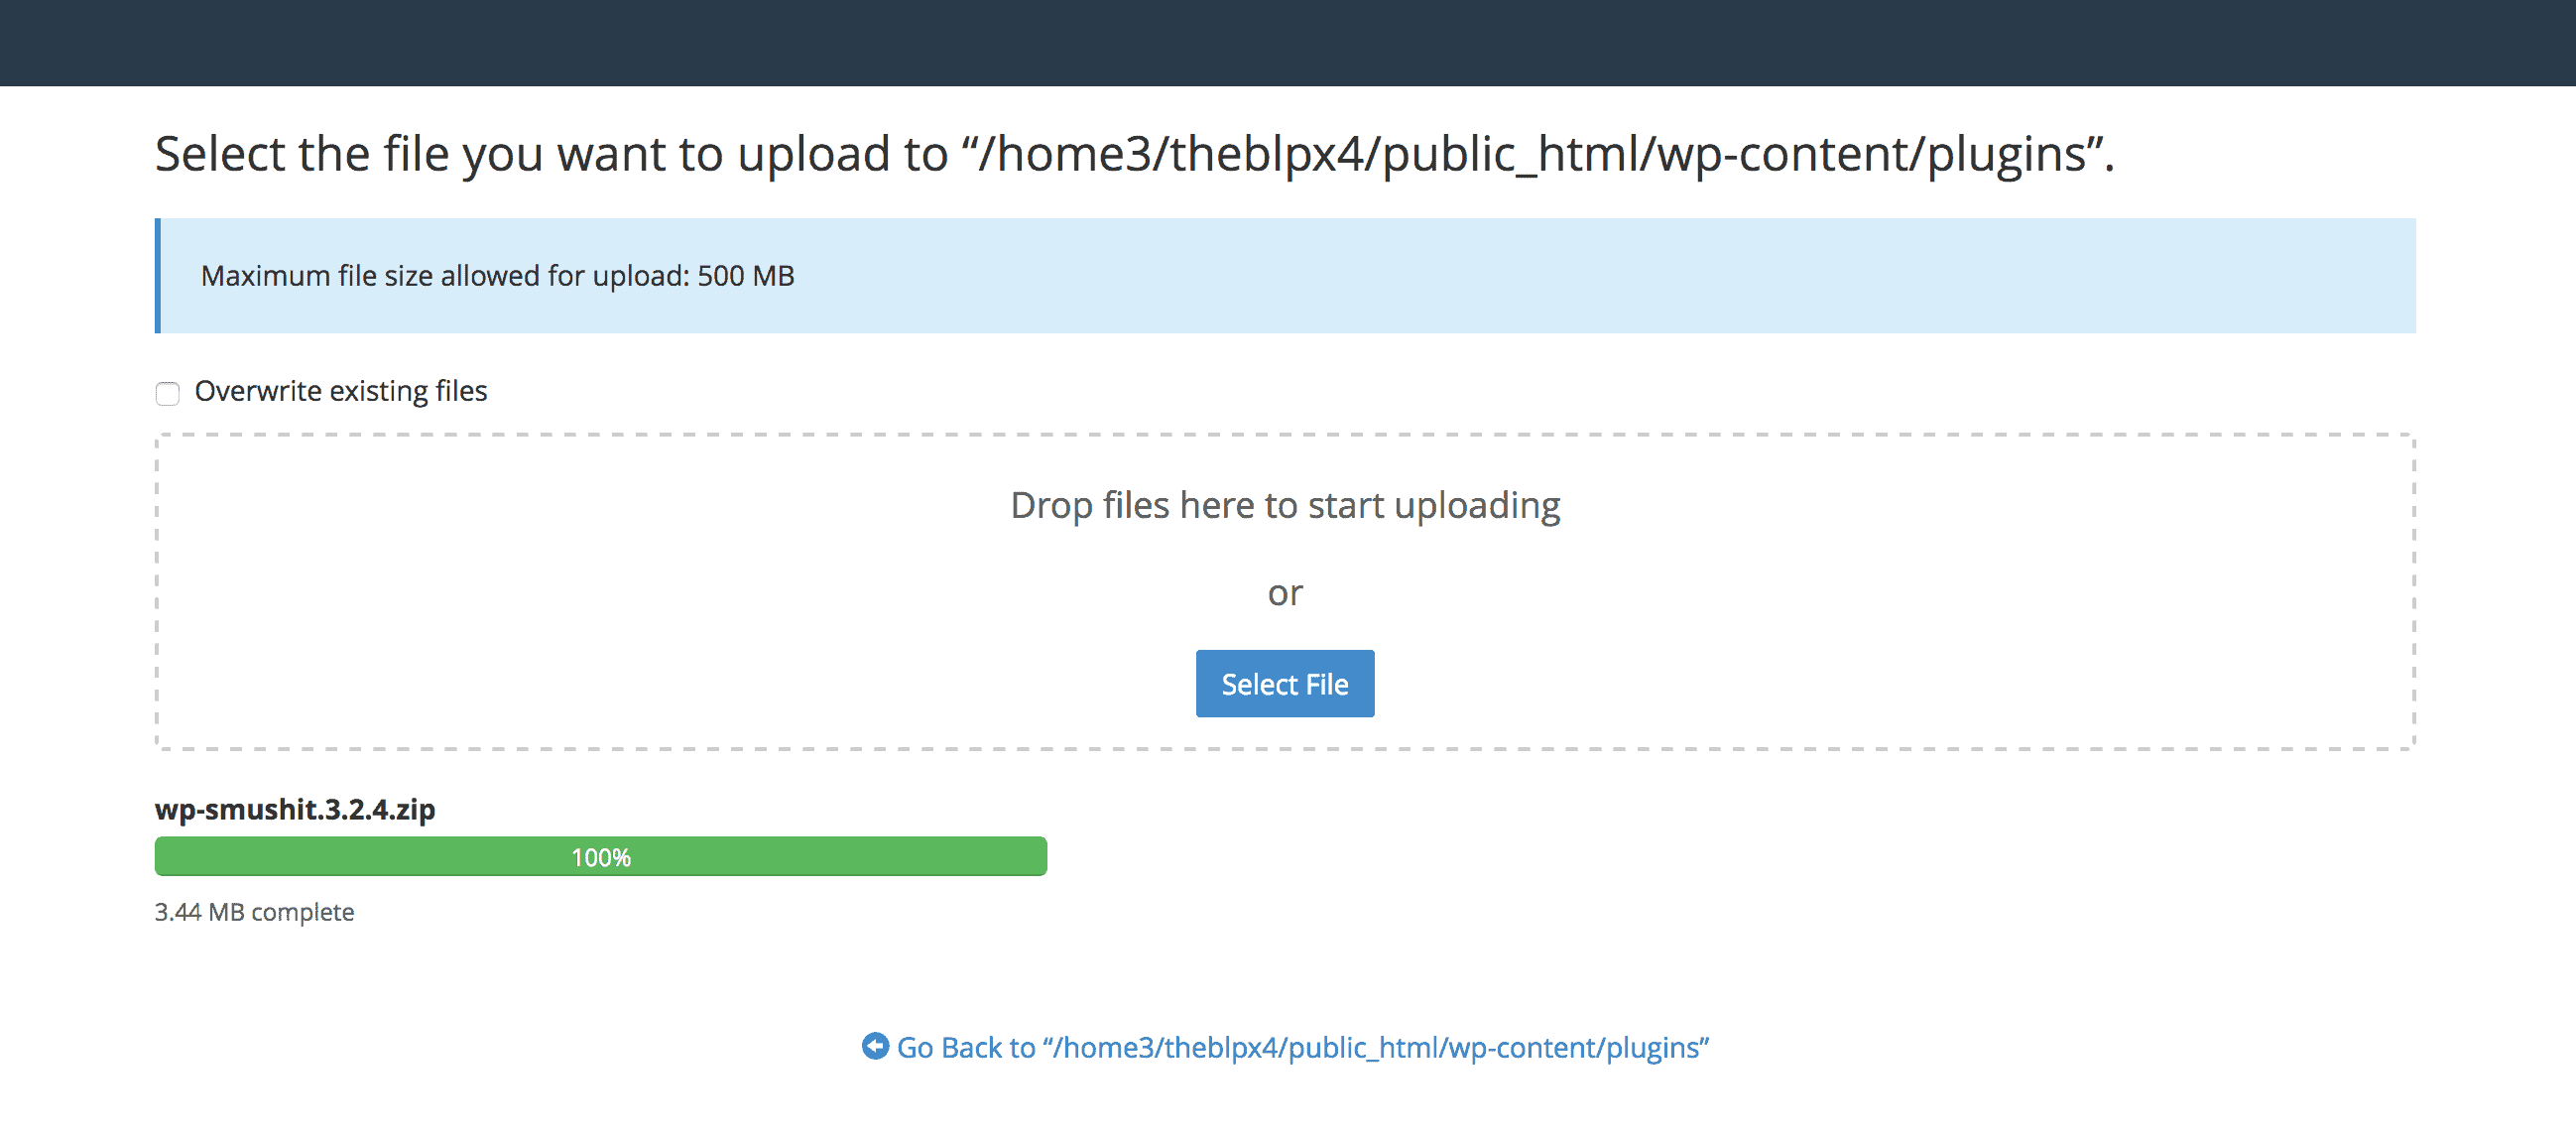
That will open a new page in a new browser that looks similar to the screenshot below. Click Select File and choose the plugin file you want to upload.
Once the upload has completed, Click the Go Back To link.
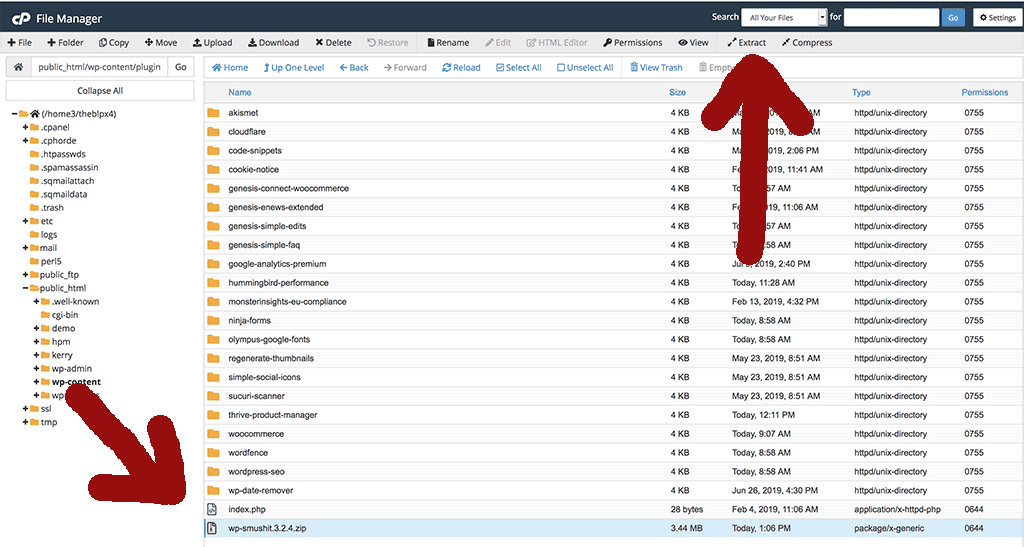
Clicking the Go Back To link will take you back to the file manager screen where you will now see the plugin file you just uploaded. In my case it is the wp-smushit.zip file. Click to select it, then click the Extract link at the top of the page to extract the plugin files.
Now, go back to your WordPress admin area. Go to Plugins >> Installed Plugins.
Then scroll through the list of installed plugins on the plugins page. You will see the plugin that you just uploaded in the previous step.
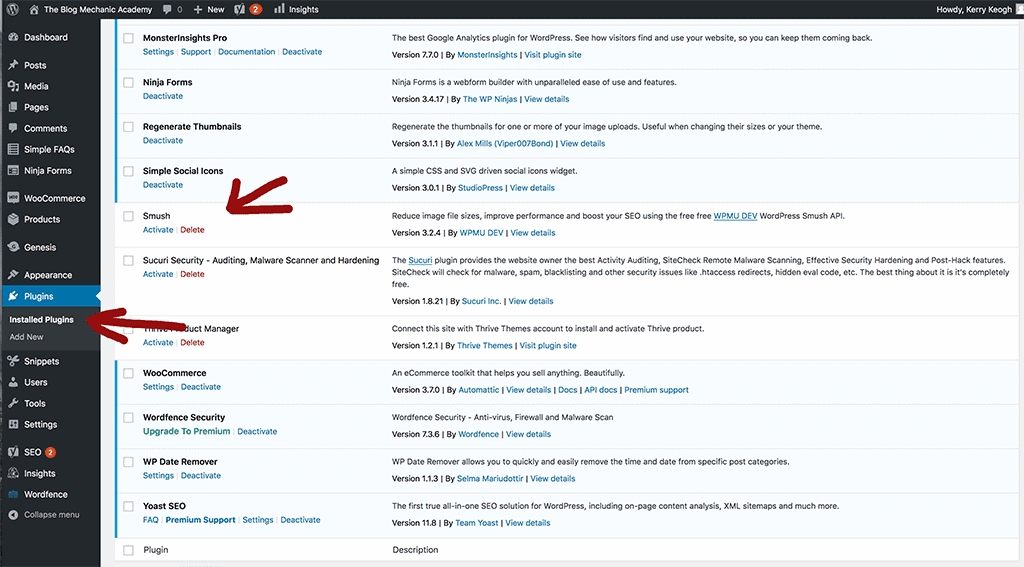
All that’s left to do now, is activate the plugin. To do that, click the Activate link under the plugin title.
Once activated you’ll need to configure the plugin settings. But we won’t do that here because all plugins work differently, and it’s out of scope of this tutorial.
*this post may contain affiliate links. That means if you click on a link and make a purchase, I get a small commission for referring you. But I only recommend things that I know for sure will help you.