How to Add Blog Posts to Pages in WordPress The EASY Way
Do you want to add blog posts to a page on your WordPress website?
By default, most WordPress themes show blog posts on the homepage.
But you might want to:
- Move posts to a blog page and have a custom homepage
- Show different blog posts on different pages
- Add a list of posts at the bottom of a page
Whatever your goal is, in this tutorial, I will show you how to add blog posts to pages in WordPress for beginners, step by step.
In This Article
- Adding all Your Blog Posts to One Page
- Adding Different Posts to Different Pages
- Which Method Is Right For You
Let’s dive straight in. 🙂
How to Add Blog Posts to Pages in WordPress
This method is best used when you want to have a custom homepage and a separate blog page on your WordPress website – like I have on this site.
If that’s your goal, follow the steps below and I will show you how to easily do that.
Step 1: Create Two New Pages
First, you need to create two new pages in WordPress:
- Home
- Blog
To create a new page, go to Pages >> Add New. Name your page anything you want and click the Publish button.
You don’t have to add any content to the blog page. WordPress will automatically add blog posts to the page for you in step two.
You can also leave the homepage blank and add the content later IF YOU ARE NOT getting any website visitors right now.
But if traffic is visiting your blog, I recommend creating your homepage content before we continue.
Step 2: Update the WordPress Settings
Next, go to Settings >> Reading
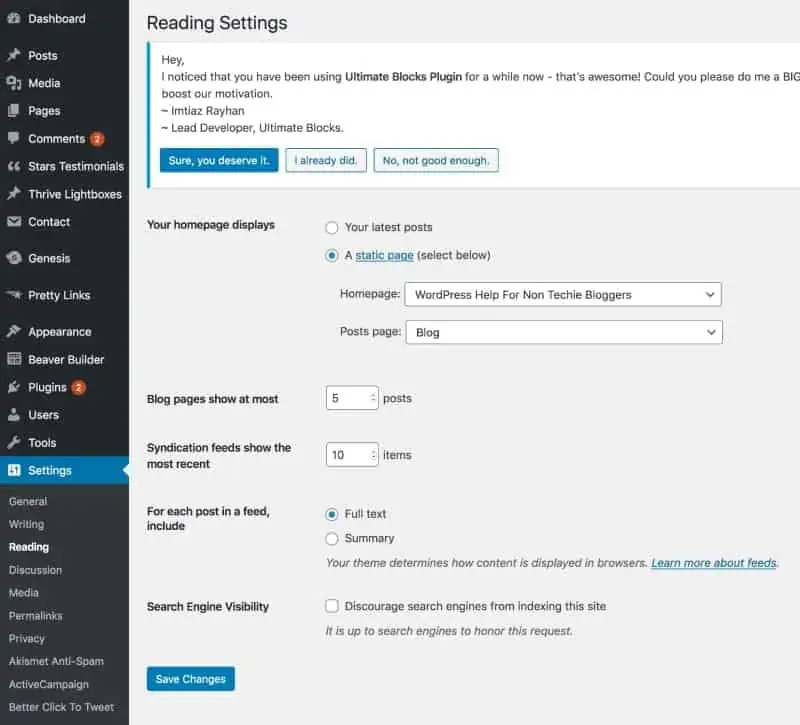
Under the ‘your homepage displays‘ section:
- Select a static page
- Choose your new homepage
- Choose your new blog page
- Save your changes
Now open up your website in a new browser window and you’ll no longer see blog posts on the front page. You will see your custom homepage instead.
All that’s left to do now is add the new blog page to the navigation menu so readers can easily find it.
Step 3: Add the Blog Page to the Navigation Menu
To add your new blog page to the navigation menu …
Go to Appearance >> Menus

Then:
- Select a menu to edit
- Add your new blog page
- Drag and drop the blog page to your desired location
- Save your changes
Note: how your new blog page looks is determined by your WordPress theme. To customize it go to Appearance >> Customize.
How to Put Blog Posts on Different Pages in WordPress
Instead of having all your posts on one blog page, you may want to add select blog posts to different pages, organized into topics. This is good for both SEO and user experience.
There are a few different ways you can achieve this, including:
- Category archive pages
- Drag and drop page builders
- WordPress plugins
- Gutenberg editor
Below I will show you how to add blog posts to pages in WordPress using each of these different methods. Choose the method that best suits you.
Method 1: Category Archive Pages
When you assign a blog post to a category in WordPress …
WordPress creates a category archive page that has only the posts in that specific category added to it.
For example, a category on my WordPress website is WordPress tutorials.
On that page, you will only find content about WordPress Tutorials – not WordPress plugins – WordPress themes – WordPress hosting – or anything else.
This is the easiest way to add blog posts to pages in WordPress because it’s done for you automatically when you publish a post!
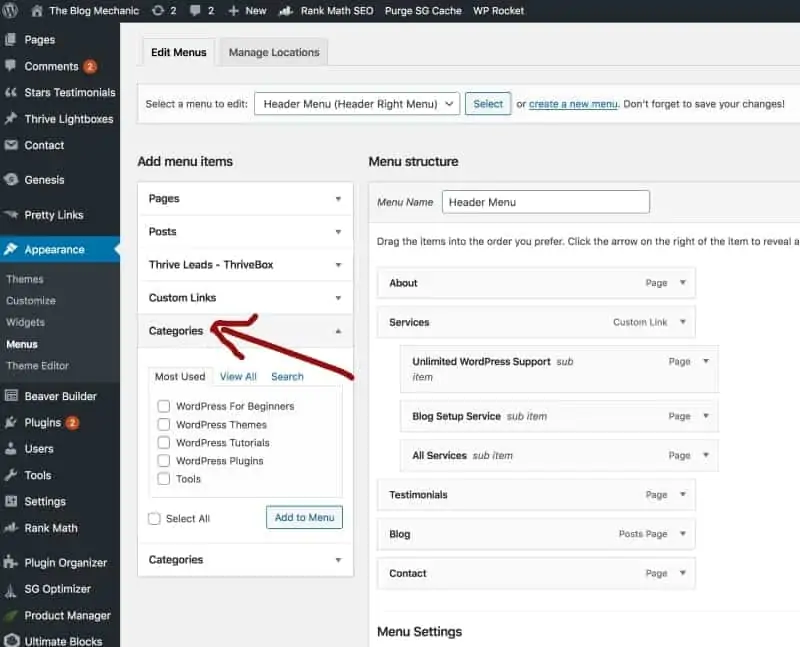
So all you have to do is add the category archive page(s) to your WordPress navigation menu the same way you would add a page.
Method 2: Page Builders
Although using category archive pages is the easiest way to add blog posts to pages in WordPress, there is no easy way to customize archive pages.
So if you want to:
- Change how the page looks
- Optimize the page for SEO
- Select the exact posts to display
- Change the order of posts
Then using a page builder is my recommended method.
Personally, I prefer using Beaver Builder because in my experience:
- It doesn’t slow down your site
- It is easy to use compared to other page builders
- It’s compatible with almost every theme and plugin
But you can use any page builder of your choice like Thrive Architect and Elementor. Whichever works best for you.
For the purposes of this tutorial though, I will show you how to add blog posts to pages in WordPress using Beaver Builder.
To get started, purchase the Beaver Builder standard license.
Install, active, and license the plugin. See this guide for further information.
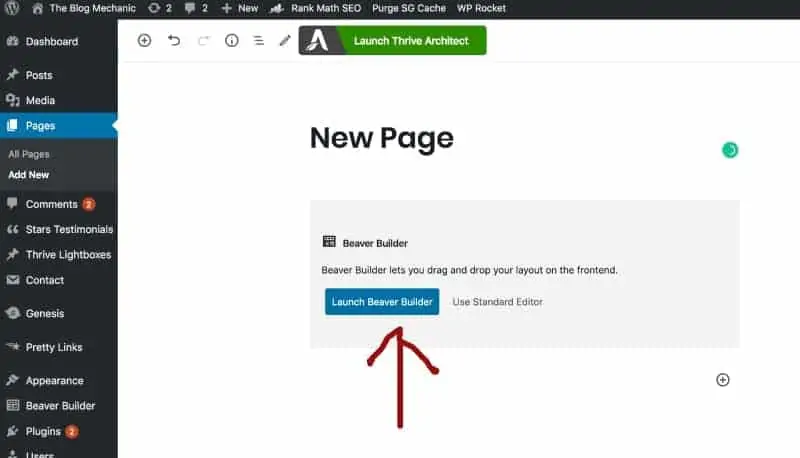
Now, to go Pages >> Add New >> Launch Beaver Builder
In the top right corner, click the + icon to open the panel. Select Rows.

Drag and drop ‘One Column‘ onto the page.

Switch to the Modules tab (next to Rows).
Scroll to the bottom module and drag and drop the posts module to the row you just added.

A configuration window will open. Have a play with the settings on each tab to get the posts looking how you want. See the documentation for help, but first …
There’s one setting I want to bring to your attention.
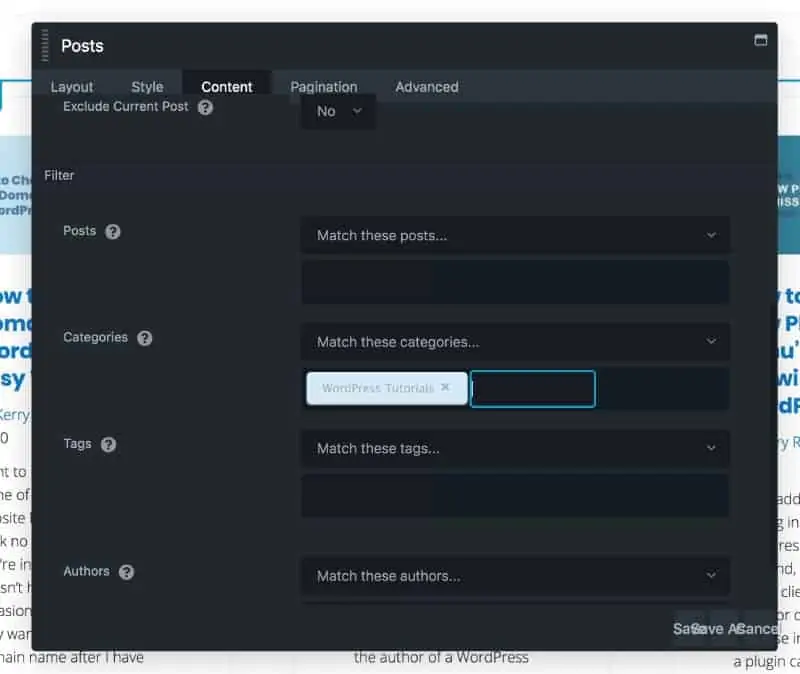
On the content tab in the filter section, you can choose to display:
- Specific posts by searching for the post titles
- All posts within a specific WordPress category
- All posts that have specific tags assigned to them
- And posts published by a specific author
When you’ve finished with the settings, save and publish your page. Then add it to your navigation menu for readers to easily find.
Method 3: WordPress Plugins
There are also plugins you can use to add blog posts to pages in WordPress.
To name a few:
Install and activate the plugin. See my guide: how to install WordPress plugins step by step.
For the purposes of this tutorial, we’ll use WP Show Posts. Watch the video below to learn how to add blog posts to pages in WordPress using this plugin.
Method 4: The Gutenberg Editor
If you’ve already upgraded from the Classic WordPress editor to Gutenberg, you can use the latest posts widget.

Open up the page you want to add posts to and search for ‘posts’. The widget will appear. Click on it to select.
By default, five of your most recent posts are added to the page in chronological order.
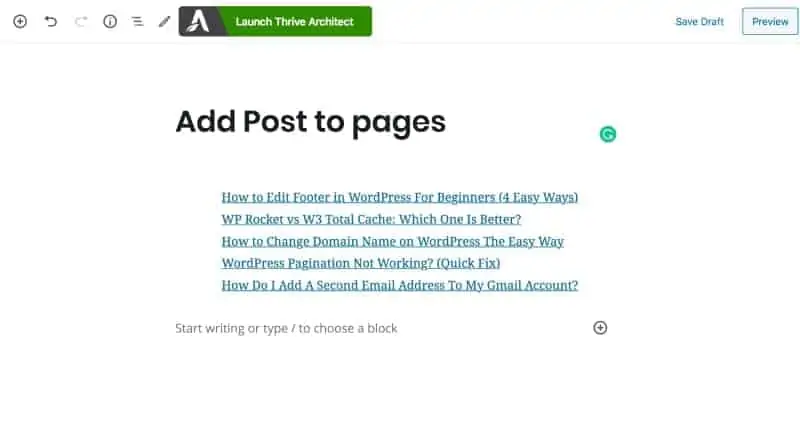
As you can see from the screenshot above, it’s just a boring list.
But in the block editor to the right, you can:
- Add post content (excerpt or full content)
- Display post dates
- Display and align featured post images
- Sort the order of posts (old to new, a to z, etc)
- Display posts from a specific category only
- Change the number of posts from 5 to 100
Like this:
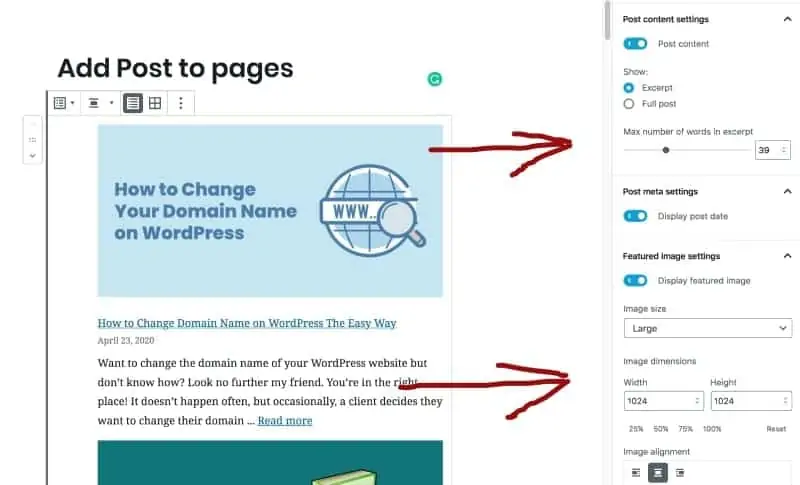
Depending on your goal, I don’t recommend using the Gutenberg editor because it’s VERY basic. I’d say too basic.
This method is best used if you just want to add a bullet point list of posts to the bottom of a page, or within blog post content.
Which Method Is Right For You?
I hope this article has helped you learn how to add blog posts to pages in WordPress.
You have learned:
- How to add posts to a dedicated blog page
- How to add different posts to different pages
You also learned that there are a few different methods you can use to add posts to pages. Including:
- WordPress reading settings
- Category archieve settings
- Drap and drop page builders
- WordPress post to page plugins
- The Gutenberg editor
If your goal is to create a custom homepage for your WordPress website and add blog posts to a blog page, you’ll want to use the WordPress reading settings.
But if you want to add different posts to different pages, using Beaver Builder or another page builder of your choice like Thrive Architect is recommended.
That way, you have full control over how your page and posts look, and you can optimize it for SEO. You can’t do that with category archive pages.
