How to Install WordPress in cPanel Step by Step

Want to install WordPress using cPanel but don’t know how? Keep reading.
When you start a blog or make a website, most hosting providers give you access to a cPanel account that allows you to install WordPress using a 1 click installation script like Softaculous.
Or you can install WordPress manually in cPanel using file manager.
In this guide, I will show you both ways, so you can choose the method that best suits you. Let’s get started.
What Is cPanel?
Put simply, cPanel is short for control panel. It’s a user-friendly interface designed to make managing the server where your website is hosted easier.
It’s a bit like the desktop on your computer. You can access all of its features and functions by clicking various icons in an easy-to-browse layout.
With cPanel, you’re able to do things like manage files, create databases, create a subdomain, or configure email accounts, and more. All things that would otherwise be complex tasks without cPanel access.
How to Access cPanel
Typically, there are a few different ways to access your cPanel account. But the easiest way is to add a forward slash and the word cPanel at the end of your domain name, like this: www.inspiredtosingagain.com/cpanel
Alternatively, you can add :2082 to the end of your domain name when visiting the http variation or :2083 for the https variation. It doesn’t matter which one you use because they both take you to the same location.
If the appended URLs above don’t work, check the welcome email from your web hosting provider for a direct login link. Also, with some hosting providers like Bluehost and a2Hosting, you can access the control panel through your web hosting account.
Once logged in, you are ready to begin installing WordPress in cPanel. I will show you the easiest method first – using the Softaculous apps installer.
How to Install WordPress Using Softaculous in cPanel
Note: not all cPanel accounts look the same but the WordPress installation process using Softaculous is the same. If your cPanel looks different from mine, don’t worry. You’ll still be able to follow along easily.
First, from the cPanel dashboard, look for a section named Software or Softaculous Apps Installer or AutoInstallers.
The name of the section differs between web hosts, so if you can’t find any of the above, just look for a Softaculous icon.
When you click the icon you’ll be taken to the Softaculous apps installer page. Select WordPress.

On the next screen, the Install tab may already be selected. If not, click it to continue.

As seen in the image above, under Software Setup, Softaculous will ask you what version of WordPress you want to install. By default, the most recent version is selected. I DO NOT recommend changing it for security reasons.
You’ll also be asked where you want to install your WordPress site. You should choose http or http://www for the protocol unless you already have an SSL certificate installed on your web server in which case you can choose https or https://www.
Then, choose the URL to install WordPress on. If you want it in the root of your domain name like this inspiredtosingagain.com …
Not in a subdirectory like this inspiredtosingagain.com/directory, you should leave the ‘In Directory’ field blank.
Next, you will see the Site Settings section.

Enter a site title and a description. The description can be changed later from your WordPress dashboard so don’t worry about coming up with the perfect tagline.
Next, enter a username and password, and an admin email address. The username and password are used to log in to your WordPress website so make sure they are easy for you to remember.
That being said, weak passwords and simple usernames are how most WordPress websites get hacked, so don’t use a username like admin or your name or a password like 123456.
From there, the rest of the settings are optional. You can choose a language, add select plugins, choose a WordPress theme, and have the WordPress installation details including your username and password emailed to you. Upon completion, go ahead and click the Install button.

Softaculous will then do its thing in the background and set up the WordPress install using the settings you entered. You will see the progress of the WordPress install on your screen.

As seen in the image above, the installer takes a few minutes to complete. And you need to wait until the progress bar reaches 100% before leaving the page. If you leave before then, the WordPress installation will likely fail.
When the installation is finished, you will see a success message with links to view and log in to your new WordPress website.

Also, if you entered an email address into the optional settings, you will get an email containing your username and password. And that’s it. You have successfully installed WordPress using the Softaculous installation script in cPanel.
If you found this guide helpful please share it on social media and let me know in the comments box below. Or keep reading to learn how to do a manual WordPress installation using cPanel.
And if you enjoyed this post, you may also like my guide on how to install a WordPress theme.
How to Install WordPress Manually in cPanel
In case you’re using a hosting account that does not include a 1 click installation script, you can always do a manual install in cPanel.
Step 1: Download WordPress
First, visit WordPress.org to download the latest version of WordPress and save the zip file on your desktop for easy access.

Step 2: Upload the File
Next, you need to upload the WordPress Zip file to your web server. From your cPanel dashboard go to Files > File Manager.

Click the File Manager icon to open it up in a new window.

Then, double click the public_html link.

If you want WordPress installed in the root of your domain name like this inspiredtosingagain.com for example, this is where you need to upload the WordPress zip file.
But if you want your WordPress website to be in a subdirectory like this inspiredtosingagain.com/blog …
You need to create a new folder inside public_html by clicking +Folder in the top left corner of the screen. Then click the folder twice to open it.
Uploading the WordPress file is easy. Click the Upload link seen in the image above.

On the next page, you can either drag and drop the WordPress zip file or click the Select File button to start the upload.

When the file is uploaded 100% the progress bar will turn green. Click the Go Back to link.

Step 3: Extract the File
After clicking the Go Back To link you may or may not see the WordPress file on your web server. If not, don’t worry. Just click the Reload link to refresh the page.

To extract the file, select it, and then, click the Extract link located in the top right corner. A pop-up window will open. DO NOT change the path. Click on the Extract File(s) button.

Step 4: Move the Files to the Root Folder
Currently, all the WordPress files are inside a folder named WordPress.

You need to move the files out of the folder. If you don’t, the URL of your WordPress blog or website will look like something like this inspiredtosingagain.com/WordPress …
… or like this inspiredtosingagain.com/blog/wordpress if you created a new folder.
Double click the WordPress folder to open it up. Once open, you will see all the WordPress core files.

To move the files, click the first folder to select it. Then, hold down the shift key on your keyboard and click the last file. This will select everything in between.

Now click the Move link at the top of the screen. Another pop-up box will appear. Delete /wordpress from the file path. Click the Move File(s) button.

In a second the files are moved out of the WordPress folder. Click the Back link to return to the root folder of your domain name or subdirectory folder.

Finally, for this step, you need to remove the WordPress folder and zip file from your server. To do that, hold down the Command key on a Mac or Control key on Windows, select both files, and click the Delete link.

Step 5: Create a Database
From your cPanel dashboard, go to the Database section and click on the MySQL Database Wizard icon.

On the next screen, enter a name for your database. Click Next Step to continue.

Now create a database username. This can be the same as your database name.
Then, use the Password Generator button to create a strong password and make a note of it on a notepad document. You need it in the next step.
Click on the Create User button.

On the next screen, you will see your database username and password. Copy and paste the details onto the notepad document with your password. Select the All Privileges checkbox. Click the Next Step button.

And that’s it. You have successfully created a new database.
Step 6: Create a wp-config.php File
Now you need to connect your new database with your website to create a wp-config.php file. To do that, visit the URL of your site. Choose a language and click the Continue button.

WordPress will then tell you what information you need to provide to create the wp-config.php file. You need your database name, database username, and database password. And I’ll tell you what to enter for the database host and table prefix. Click the Let’s Go! button.

Now go ahead and enter the database information you created earlier. Leave the Database Host as localhost. You DO NOT need to change the table prefix.
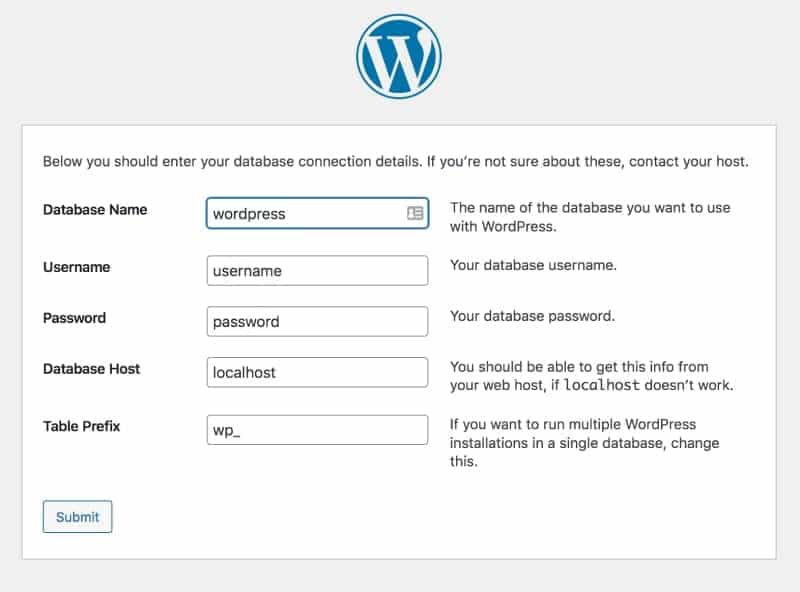
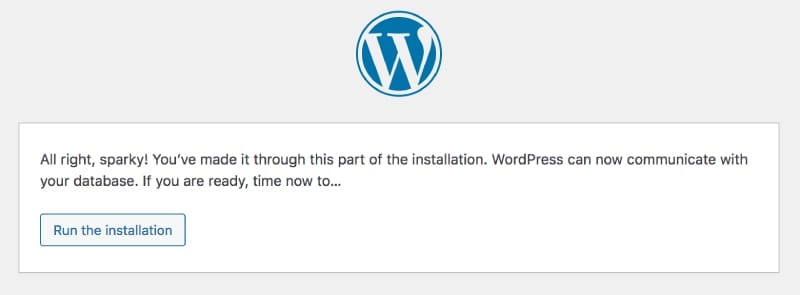
Once done, click the Submit button. WordPress will establish a database connection and show you a success message. Click the Run the Install button.
Lastly, on the next screen, add a site title, admin username, password, and email address. Click the Install WordPress button to finish the installation, and you will see a success message.

That’s all. You can now log in to WordPress admin, add a WordPress theme , and start blogging.
I hope you found this guide helpful. If you did, please share it on social media and let me know in the comments box below.