How to Start a Blog 2022
This easy guide for beginners will teach you how to start a blog.
Hi, I'm Kerry, The Blog Mechanic, and I have helped hundreds of people just like you create a blog. Here's what some of them are saying.

KIM SUTCLIFFE
"It is such a relief to find someone competent like Kerry. My blog was set up quickly, with great communication at each stage and all the questions I had being answered very clearly."

GAVIN LISTER
"Hiring Kerry is the best decision I made. She got my site set up and working smoothly in record time with a great theme and all the back end tech that would have taken me ages to figure out."
But I understand that hiring someone to create a blog for you isn't an option for everyone. So I have created this free step-by-step blog tutorial.
In this guide, you will learn how to make a blog yourself. The process is easy to follow, even if you're not a techie person, so don't worry.
You do not need any technical skills or coding experience to create a successful blog. Let's get started.
How to Start a Blog in 10 Easy Steps
So, how do you start a blog? The table of contents below outlines the exact steps in the exact order they should be followed to create a blog (a blog that makes money!).
Just work through the steps one at a time and if you do get stuck or have questions about starting a blog, feel free to contact me. I am always here and happy to help.
Step 1: Choose a Blog Topic
Note: already know what to blog about? Go straight to step two.
The first step towards becoming a successful blogger is to choose a blog topic (aka a blogging niche) to write about. A topic that will be the focus of all your blog content.
For example:
- Gardening
- Bad credit
- Pet care
- Music
- Cooking
- Health and fitness
During my 10+ years online, I have completed a lot of blogging courses that teach different approaches to picking a blogging niche.
Some bloggers say you should choose a niche that you are passionate about. Others say that passion doesn’t matter – just select a topic that makes money.
And a lot of people will tell you that you don’t even need to know anything about the topic you choose, you just need to have an interest in learning about it. You can share what you learn as you go.
But in my experience, all three of these approaches ‘on their own’ are flawed and it is best to blog about a topic that:
1. You are passionate about and,
2. You have some experience and knowledge in and,
3. Is popular and proven to make money.
Because you grow a blog that makes job replacing income by creating LOTS of quality content consistently – as many as 2 to 3 posts a week or more in the very beginning.
But if like most people just getting started you don’t have the resources to outsource content creation, you will have to create ALL the content yourself.
The problem?
Can you see yourself writing about a topic that you have no interest in every single day for the next two or more years?
Or being able to produce high volumes of quality content around a topic that you know nothing about?
You’ll likely want to quit before you’ve even started!
While you don’t need to be THE expert to blog about a topic, you do need some knowledge and experience to be seen as an expert to all those a few steps behind you.
To find a blog topic that meets the criteria above follow the steps below:
1. Start by making a list of all your:
- Hobbies and passions
- Skills and talents
- Life and work experiences
Just do a massive brain dump and be creative, there are no restrictions!
2. Now go through your list of topics and ask yourself:
- Does this topic excite me enough to write and talk about it every day?
- Do I have any knowledge and experience on the topic that I can share with others?
If the answer is no to either of these questions, cross the topic off your list.
Upon completion of this exercise, all that’s left to do is a little research to make sure the remaining topics on your list are popular and profitable before making a final decision.
3. For each topic on your list:
- Go to Google and search for ‘best blogs about [enter your topic]’ and then,
- Use Ahrefs trial to see how much search traffic the blogs you find get (here’s how)
If you can easily find 10 blogs on a topic that generate around 20,000 monthly organic visitors from Google search, and they are selling products (their own or as an affiliate) and/or services, that’s a very good indication the topic is both popular and profitable.
Step 2: Choose a Blogging Platform
Although there are many blogging sites to choose from, today, I am going to save you a ton of time and frustration by recommending WordPress.org.
WordPress is the best blogging platform for anyone who wants to start a blog that makes money because it comes with no limitations (more on that in a minute).
As you can see from the screenshot below taken from BuiltWith.com, WordPress is used to build more than 43% of all websites on the internet, and for good reason.

With WordPress, you can customize and monetize your blog any way you want because it is self-hosted.
You don’t get that freedom with many of the other blogging sites. They are hosted for you and come with strict terms and conditions that dictate the future of your blog.
The WordPress platform is free, but as I mentioned above, it is self-hosted, so you do have to pay for a domain name and a web hosting account.
How much does it cost to start a blog?
Using the domain registrar (Namecheap) and the web hosting company (Bluehost) that I recommend in this guide you can start a blog for only $39 USD.
Below is a chart breaking down the costs for a 1-year hosting plan with Bluehost who gives new customers a massive 72% discount using this link.
Note: You can also get a free domain name from Bluehost for the first year, but for security reasons, you should keep your domain name and web hosting separate.
| Web Hosting | $33 for 1 year (that's $2.75 a month) |
| Domain Name (from Namecheap) | $5.98 first year (then $8.98 a year) |
| SSL Certificate | FREE forever |
| CDN | FREE forever |
| Professional Email Address | FREE forever |
| Total Cost | $38,98 for 1 year |
Disclosure: This post contains affiliate links that may pay me a small commission at no extra cost to you if you choose to make a purchase. Thank you for supporting The Blog Mechanic.
Can you start a blog for free?
Yes, you can start a blog for free using blogging sites like WordPress.com (the hosted version of WordPress.org), Wix, Tumblr, Blogger, and Medium.
However. It's risky and not recommended if you want to make money blogging!
Because if they think you are breaking their rules, intentionally or not, they will delete your blog and all its content without warning. It happened to me when I made the mistake of starting a blog with a free platform.
Free platforms like Wix and Blogger are good options if you just want to blog for fun, or when you want to give blogging a try before committing to anything.
But if you are serious about starting a blog that makes money, my advice is to use self-hosted WordPress.
Step 3: Register a Domain Name
After choosing a blog topic and a blogging platform, the next step is to find a domain name that is available and then register it with a domain registrar.
A domain name is the web address of your blog. It is the URL of your site. For example, the domain name of this website is www.theblogmechanic.com
Choosing a Domain Name
A good domain name is short, descriptive, memorable, and easy to spell without any numbers or special characters like dashes and underscores.
Generally, it is best to get a domain name that ends in .com because .com is the most popular and most remembered domain name extension worldwide.
If the .com of your desired domain name is already being used DO NOT buy .net, .org, .co, or any of the other less popular extensions like .blog - you will lose traffic to the .com extension and you may run into trademark issues.
If however, the .com extension of your perfect domain name is not being actively used, it's just up for sale at a ridiculously high price (thousands), then it's okay to start a blog on one of the other extensions. You can always buy the .com once your blog is profitable.
The domain registrar I personally use and recommend to all the clients that I work with is Namecheap. Let's go ahead and register your domain name.

Click here to open NameCheap in a new window. Then enter your chosen domain name into the search bar (without .com) and click the 'Search' button.

On the next page, NameCheap will let you know if the domain name you want is available. If it is, click the Add To Cart button to continue. If it is already taken, keep searching until you find a domain name that is available.

Next, you are offered some additional services. You DO NOT need any of these extras! Bluehost is the web host we are using in this guide and they will give you a free SSL certificate and a professional email address. Click the 'Checkout' button to continue.

Next, on the order confirmation page, check your domain name for spelling mistakes, activate auto-renew, and click the 'Confirm Order' button.

Once confirmed, create a new account and continue to the next step.

Now complete your account information and click the 'Continue' button.

Scroll to the bottom of the setup page and check ‘save the configuration above to my default checkout settings'. Click Continue.

Finally, choose your payment method and click Continue to proceed to checkout.

After payment, you are taken to a purchase summary page where you can download a receipt. And that's it! You don't need to do anything else with your domain name right now. We'll come back and update domain name settings in step 5.
Step 4: Create Web Hosting Account
Now that you have a domain name, to get your blog online, you need web hosting.
Web hosting is where your blog lives on the internet. It's where all your website files are stored. And it is CRUCIAL to the success of your blogging business.
Because hosting is like the land your house is built on. If that land is unstable and it moves and cracks, the foundations of your house will weaken and it will fall down.
Well, the same is true for web hosting. It significantly impacts the performance and functionality of your blog.
So for new bloggers, I recommend Bluehost. That's where I started my blog and it's where many of the clients that I work with host their blog.
Why Bluehost?
In my experience, Bluehost is a good choice for new blogs and websites because:
- Cost: New customers get a generous discount of more than 60%
- Uptime: They deliver on their promise of a guaranteed server uptime of 99.98%
- Support: They have responsive 24/7 customer support via phone and live chat
- Ease to Use: Their user interface is beginner friendly and easy to navigate
Best Hosting For Beginners
Let's go ahead and create your account at Bluehost.
Click here to open Bluehost in a new window and click the Get Started button.

On the next page, select your desired web hosting plan. I recommend the plus or choice plus plan because it comes with unlimited resources, but the basic plan is enough to get started - you can always upgrade later if you need more resources.

Where it says ‘Use a Domain You Own’ enter the domain name you registered at Namecheap and click the Next button to continue.

Next, fill out your account information, choose a billing cycle, and make payment via PayPal or with a credit or debit card.
Note: you DO NOT need any of the package extras to start a blog. Uncheck Codeguard Basic and Sitelock Security.

After payment, you will see a success message with instructions to pick a username and password so you can log in to your Bluehost Account. Click the Create Your Account button and follow the prompts.

That's all! You have successfully created a web hosting account for your new blog. Bluehost will send you an email containing all your account information.
You don't need to do anything more with your Bluehost account right now. First, we need to update your domain name settings.
Related Reading: How to Choose the Best Web Hosting
Step 5: Update DNS Settings
This step may sound technical, but don't worry, it's easier than many people think.
Right now, your domain name is using Namecheap's DNS settings, so when you visit your domain name, you will see Namecheap's default 'registered at' page.
It looks like this:

Before anyone can see the blog we are about to create, you need to update the DNS settings to point your domain name to your Bluehost account.
To do that, log in to Namecheap. You will see your domain name on the dashboard. Open the dropdown menu to the right of it and click the Manage link.

Then, scroll to the Nameservers section and select Custom DNS.

Now enter ns1.bluehost.com and ns2.bluehost.com then click the Green Tick to save your changes.

Once saved, DNS changes can take up to 48 hours to take effect, but it's usually much sooner than that - less than an hour in my experience.
Wait half an hour or so and go to your domain name. When you see a Bluehost coming soon page the nameserver changes are complete and you can continue.

Ready to start a blog? Get started today for just $2.95 a month. Bluehost gives new customers a generous 63% off web hosting.
Step 6: Install WordPress
Another nice thing about Bluehost is: they automatically install WordPress for you which is helpful when you're starting a blog for the first time.
Here's how it works.
When you log in to your web hosting account, you are walked through a simple 4-step process to help you create a blog quickly.
But since you are following this tutorial, I am going to show you the optimal setup for your new blog, so, you can skip the steps as seen in the image below.

After skipping the steps, Bluehost will install WordPress and take you to the dashboard.

From the Bluehost dashboard, you can use the two buttons in the top right corner to:
- Log in to WordPress or
- Launch the site
But wait! Your blog is not ready for the world to see yet.
Before you launch, there are some important settings to configure, and you should complete steps seven (customize your blog) and eight (write your first blog posts).
Bluehost Settings
Inside your Bluehost account, in the left sidebar, click My Sites.

On the next screen disable:
- automatic updates (important!).
Sometimes, updates can break a blog, so you should test them manually and ALWAYS backup your blog before updating it.

You may also want to turn off 'Disable Comments on Posts Older Than 28 days'. It is recommended but optional.
Upon completion, click the 'Log in to WordPress' button and continue.
WordPress Settings
When you log in to WordPress for the first time, you may feel a little overwhelmed by all the settings in the left sidebar. Don't be.
There are only a few settings to configure and I am going to walk you through each one step by step. You can ignore everything else for now.
1. General Settings
In the left sidebar, under the 'Settings' tab, click 'General'.

Enter:
- Site title: the name of your blog.
- Tagline: a few words that describe what your blog is about.
- Admin Email address: where notification of blog comments, contact form messages, and more are sent.
Scroll down and save your changes.
2. Reading Settings
Under the 'Settings' tab, click 'Reading' and select the last option.

This setting tells Google and other search engines that your blog is still in development and not yet ready to be found online because ...
When you add a theme later in this guide to change your blog design, it will be filled with demo content, and you don't want that demo content showing in the search results.
We will come back and change this setting before you launch.
3. Discussion Settings
The discussions tab is where you control how blog comments work.
If you don't want people to leave comments on your blog posts, just uncheck 'Allow People to Comment On New Posts' and save your changes.
If you do want to accept blog comments, I recommend the following settings:

Turn On:
- Allow people to submit comments on new posts
- Comment author must fill out name and email
- Show comment cookies
- Enable nested comments
- Email me whenever anyone posts a comment
- Comment must be manually approved
Turn Off:
- Attempt to notify any blogs linked to from the post
- Link notifications from other blogs (trackbacks and pingbacks)
- Users must be registered and logged in to comment
- Automatically close comments on posts older than 28 days
- Break comments into pages with ...
- Email me whenever a comment is held for moderation
- Comment author must have a previously approved comment
Note: Spammers can use trackbacks and pingbacks to post spammy and malicious links on your site, so you’ll definitely want to disable those.
Upon completion, save your changes.
4. Permalink Settings
Permalinks are the most important settings on any WordPress blog or website because they control the URL of blog posts and pages.
For example, the permalink of this post is: theblogmechanic.com/how-to-start-a-blog
It is optimized for search engines and for humans making it easy for Google to understand and index, and for people to share on social media, in an email, etc.
But the default permalink structure that comes pre-installed with WordPress looks like this: https://www.theblogmechanic.com/?p=123
It gives Google no clue as to what the content is about, and readers of your blog will never remember and share a URL that looks like that.
To change the permalink structure, under the 'Settings' tab, click 'Permalinks'.

The recommended permalink structure for both humans and search engines is 'Post name'. Select it and then save your changes.
Not started your blog yet? Get started today for just $2.95 a month.
Step 7: Customize Your Blog
Right now, your blog will look something like this:

That's the default WordPress theme for 2022. Yours may look different if the default theme from a previous year is activated.
Either way, to make your blog look just the way you want, next, you'll need to select and install another theme to change the design and layout.
1. Choose a Theme to Change Your Blog's Design
There are more than 9000 free WordPress themes to choose from at WordPress.org

To find a theme that you like, from the WordPress dashboard, under 'Appearance' click 'themes'. Then, click the 'WordPress.org Themes' button.

You will then see the most popular themes. To preview one of them, hover over the screenshot and click the 'Details and Preview' link.

Once you find a theme that you like, install and activate it. See my step-by-step tutorial on how to install a WordPress theme for more information.
That said, it will take you a long time to search through 4000+ themes and they are not all created equally. Some are much better and easier to use than others.
To save you time, below are the themes I recommend. They are all free to use, or you may want to purchase a premium license for more customization features.
After installing the theme of your choice, it won't look exactly like the theme demo when you activate it. You'll need to set it up to look that way, but don't worry, most theme developers provide step-by-step instructions and a one-click demo import.
Just don’t let theme selection overwhelm you!
After helping hundreds of people create a blog, I have found that this step holds many people back because they get fixated on finding the perfect theme and they waste time that could be spent writing content instead.
So if you can't find a theme that you love right now, just choose one from the list above and move on. You can always change it later. Let’s continue.
Related: How to choose a WordPress theme (top 10 things to consider).
2. Install Essential Plugins
Plugins are what make WordPress so popular. They allow you to add new features and functionality to your blog or website without knowing how to code.
Currently, there are more than 59,000 free plugins in the WordPress.org repository and thousands more premium plugins available for purchase.
But you must be careful, badly coded plugins can have a negative effect on website performance and security, so it's important to use the right ones.
When starting a blog, there are eight essential plugins you should install for security, SEO, spam protection, site speed, and more.
Below is a list of the best plugins to use. Then, I'll show you how to install them.
1.Antispam Bee
Antispam bee is a free plugin that will protect your blog against spam by blocking spam comments and trackbacks. It will save you hours of time when moderating comments.
2.Yoast SEO
Yoast SEO helps you optimize your content for Google and other search engines to grow your blog's organic traffic. There is a free version and a premium version that comes with more features, but the free version is all you need to get started.
3.Wordfence
Wordfence is the best plugin to help keep your blog safe from hackers by protecting it behind a firewall and running daily scans for malware and other vulnerabilities that hackers can easily exploit. Wordfence is free to use, however, they also offer a premium version for even more protection. I use the free version.
4.WP Rocket
WP Rocket is a premium site speed plugin that makes it easy for non-techie users to improve page load time and other important performance scores at the click of a button. This plugin is a must for serious bloggers who want to be found on Google.
5.MonsterInsights
MonsterInsights connects your Google Analytics account with WordPress so you can see how many people are visiting your blog, what content they are reading, and where they are coming from to help you make informed decisions to grow your blog. There is a premium version, but when starting a blog, the free version is all you need.
6.Ninja Forms
With Ninja Forms you can create contact forms so readers can easily get in touch with you. The plugin is free and easy to use with a drag and drop user interface.
7.UpdraftPlus
UpdraftPlus will backup your blog and allow you to quickly restore it with 1 click if you get hacked or your blog breaks after an update or even through human error.
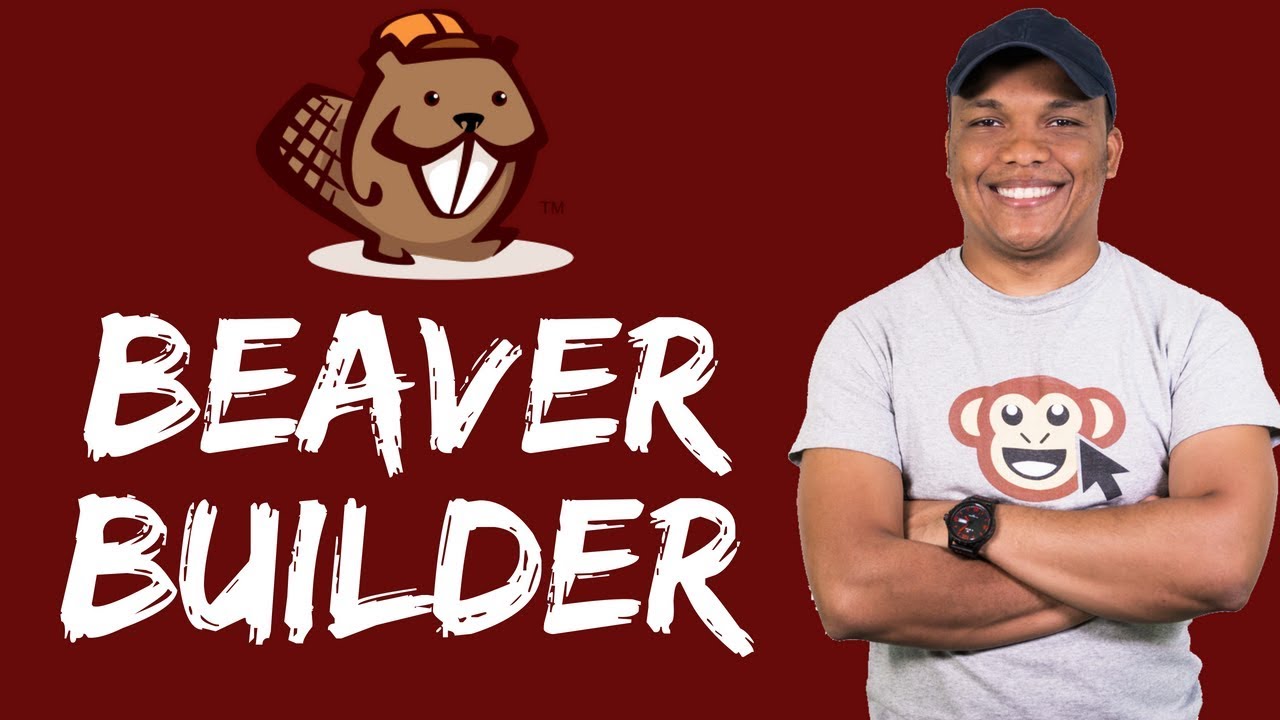
8.Beaver Builder
This is a drag-and-drop WordPress page builder plugin to create homepages, landing pages, about pages, lead generation pages, and more. It is free to use, but the premium version gives you access to loads more useful features. I have used Beaver Builder to create all the pages on this website. I use the standard plan.
9.Smush
3. Create Core Pages
Before you start blogging, there are some important core pages you need to create and add to your blog's navigation menus.
These pages will help readers:
- Find important information
- Easily navigate your site
- Understand what your blog is about and how you can help them
- Protect you legally
Here are the core pages you need.
1.Homepage
By default, WordPress lists all your blog posts in chronological order on the homepage which is okay if you're just blogging for fun. But for a business blog, it serves no purpose and should be replaced with a custom homepage.
What you include on the homepage depends on your blogging goals.
However. There is one thing every homepage must have: a clear value proposition with a call to action at the very top of the page.
No matter what niche you are in or what your business model is (services, affiliate marketing, coaching, etc) ...
Within 10 seconds or less of landing on your homepage, readers should know what you can do for them and how they can get it. If not, they will just leave and never return.
2.About Page
The about page should tell readers more about how you can help THEM, not every little detail about you.
The brutal truth is: readers don't care about you, they care about what you can do for them. So use the about page to tell them:
- Who you are (briefly)
- Your experience and skills (related to your niche)
- How you can solve their problems and pain points
- A clear call to action to take the next step
For readers who want to know more about you and the journey that inspired you to start a blog, you can write a life story page and link to it from the about page.
3.Contact Page
You should make it easy for visitors to get in touch with you and a contact page is a great way to do that without publicly sharing your email address.
Use the Ninja Forms plugin to add a simple contact form to the page and be sure to include a short message so people know what to expect after contacting you.
If you are active on social media, you may also want to add links to your profiles so people can follow and engage with you on there as well.
4.Blog Page
Note: You only need this page when using a custom homepage.
And if you selected and set up a theme using 1 click demo import as recommended in this guide, this page has likely already been created and designed for you.
I'll show you how to add it to the navigation menu soon.
5.Legal Pages
Even if you have nothing to sell on your blog right now, you are still legally required to have legal pages. At a minimum you need:
- Privacy policy to comply with GDPR regulations
- Disclaimer to protect you from lawsuits
- Terms and conditions to protect your rights
Later, when you start monetizing with affiliate offers, you also need an affiliate disclosure.
Creating Pages In WordPress
To create a WordPress page, under the 'Pages tab', click 'Add New'.

The page editor will open.

Add a page title and click the 'Save Draft' link in the top right of the screen.
You can use the standard editor which is powered by Gutenberg but for beginners, Beaver Builder is much easier to use. Click 'Launch Beaver Builder'.
Below is a step-by-step tutorial showing you how to use Beaver Builder.
If you're unsure what content to add to your pages, look at what other blogs in your niche are doing and model (not copy) them.
Adding pages to the navigation menu
Next, I will show you how to add your core pages to the navigation menu so readers can easily find them.
You should add the homepage, about page, contact page, and blog page to the main menu in your website header. The legal pages belong in your site footer.
To get started, under the 'Appearance' tab, click 'Menus'.

On the next page:
- Click the 'create a new menu' link
- Enter 'Header Menu' as the menu name
- Click the 'Create Menu' button

Now just drag-and-drop the menu items into your desired order and click the 'Save Menu' button. Repeat the steps to create a footer menu for your legal pages.
4. Add a Logo
This step is optional but recommended because a good logo helps establish and communicate your brand.
With a quick Google search, you'll find lots of free logo makers online. However, in my experience, they are not very good. I used Design Evo to create a simple logo for $49.
When you have downloaded your logo, inside WordPress under 'Appearance', go to the 'Customize' tab.


For themes that don't have a header or header builder tab, go to 'Site Identity' instead.
Congratulations! You have just learned how to create and customize a blog. It's time to write and publish your initial blog posts. Then, your blog is ready for the world to see.
Step 8: Write Your First Blog Posts
Before launching your blog you should write and publish 5 to 10 posts and delete any demo content (including pages) that you imported when setting up your theme.
Wondering what to write about?
There was a time when your first blog post would be an introductory post telling readers who you are, why you started blogging, and what you will write about.
That's not how blogging works anymore! They are Google driven and rely on search engine traffic to become successful.
You need to write about things that your target audience is searching for online. To find out what that is you should:
- Do keyword research
- Create informative content targeting the keywords you find
- Optimize your content for Google
Recommended Reading: How to Write Blog Posts Faster (9 simple tips)
Publish your initial posts
When you have your keywords it's time to start writing. Creating a new post is similar to creating a new page in WordPress.
From the WordPress dashboard, under the 'Posts tab', click 'Add New'.

For posts, I recommend using the standard WordPress editor, not Beaver Builder because if you ever decide to use a different page builder it will leave your blog posts in a mess and you'll have to rewrite them. So.
Add a post title, write your content, and then in the right sidebar under the 'Post' tab, select or add a new category, upload a featured image and click the 'Publish' button.

When you've published 5 to 10 blog posts, you are ready to launch.
Launch your blog
Now that your blog is ready to go live, first, we need to let Google and other search engines know that it is no longer in development.
Go back to the 'Reading' tab under 'Settings' inside WordPress and deselect 'Search Engine Visibility'. Click the 'Save Changes' button.

Next, inside Bluehost, go to 'Settings' under the 'My Sites' tab.

Scroll to the bottom of the page and toggle off the 'Coming Soon Page'.

Congratulations! Your blog is live. I suspect you're doing a happy dance right now because that's exactly how I felt after starting my first ever website back in 2010.
You have learned so much already:
- How to start a blog
- How to create a blog and customize it
- What to write about
- How to optimize your content to be found in Google
But the old saying, create it and they come, simply isn't true. You need to know how to grow your blog's audience.
Ready to follow this guide and lauch your blog? Start a blog today for just $2.95 a month and get 63% off your hosting plan.
Step 9: Promote and Grow Your Blog
When it comes to growing your blog, many of the tactics you read about online today are no longer effective.
Blogging has changed!
The best strategy to grow a blog in 2022 is SEO. Keep writing well optimized blog posts that target keywords people are searching for online, and build backlinks.
It's that simple!
Every new blog post you publish is a new opportunity to get found in Google search. And the more backlinks you have, the easier it is to rank on page one where all the traffic is.
I've already shared resources to help you find keywords and learn how to optimize your content. If you missed those here they are again.
To get backlinks, guest posts on other niche related websites. It's a great way to build authority and get exposure to new audiences.
Step 10: Make Money Blogging
When starting a new blog, there are only two monetization strategies you should consider to make money as quickly as possible. They are:
Selling Services
Unless you picked a blogging niche that you know nothing about, you likely have skills and experience that you can package up and sell as a service.
If you're a creative designer, a programmer, a writer, etc, you can sell 'done for you' services like I do here at The Blog Mechanic. If you're a nutritionist, a life coach, an accountant, and the like, you can offer consulting services.
Selling services is the fastest path to monetization because you don’t need to create content for digital products and online courses upfront.
You also do not need a lot of traffic to make a decent full-time income. If you have connections in your niche you can join forces and form a referral partnership.
Affiliate Marketing
With the right types of blog content (optimized for search engines), you can make money promoting other people's products and services as an affiliate.
To get started, there are some popular affiliate networks you can join including ShareASale and Clickbank.
After joining an affiliate program, you get a unique tracking link. You add the links to your content and when someone clicks and makes a purchase, you earn a commission.
The best types of blog content for affiliate marketing are:
- Best of listicles
- Product reviews
- Product comparisions
On one hand, affiliate marketing is a better business model than selling services because you are not trading time for money, and you don't have to deal with customer support. But you need A LOT more traffic and good SEO skills to succeed.
How to Start a Blog FAQs
Does it cost money to start a blog?
If you are starting a blog with the intention of making money online, yes it does cost money to start a blog. In this guide, I recommend using WordPress.org as a blogging platform, and is free. However, you will need to pay for a domain name and web hosting.
Is blogging still profitable?
Yes, blogging is still profitable. There are a many ways to monetize a blog, including advertising, sponsorships, affiliate marketing, and product sales. While it takes time to build up a large enough audience to make significant income from a blog, those who are willing to put in the effort can still be successful.
What does the word blog even mean?
I have answered this question in another article titled What Does Blog Stand For. In it, explain what "blog" means and how bogging has evolved since the mid-1990s.
Conslusion
I hope you found this step-by-step guide on how to start a blog helpful.
If you were following along with me, your blog is live and you know exactly what you need to do to grow it and make money. Leave a comment below if you have any questions.
Create a blog today using WordPress and Bluehost for just $2.95 a month. New customers get a generous 63% discount.