How to Change Domain Name on WordPress (The Right Way)

Want to change the domain name of your WordPress website but don’t know how?
Look no further my friend. You’re in the right place!
It doesn’t happen often, but occasionally, a client decides they want to change their domain name after I have setup their WordPress website.
Other times, I get requests from readers of The Blog Mechanic who are rebranding their business and want to hire me to change their website URL.
The process is actually pretty simple when you know how …
But changing the URL of any site can have a negative impact on your SEO rankings, so it must be done properly.
In this tutorial, I’ll show you how to change your domain name, the right way, step by step.
Before We Get Started
It’s important to know that:
This guide is not for moving a WordPress site to a new web host. The process for that is different. I’ll show you how to do that in a separate tutorial
Also. When you change your domain name it will temporarily affect your SEO rankings.
This is normal and to be expected!
It takes time for Google to adjust to the domain change, during which time, chances are, you will likely get less search traffic for a short time.
But don’t worry …
By following the steps in this tutorial, you are significantly reducing the impact that changing your WordPress site URL has on SEO rankings and search traffic.
How to Change Your Domain Name
I’m going to assume that you’ve already purchased a new domain name and added it to your web hosting account.
If not, I recommend NameCheap. That’s where I get all my domain names. Support is outstanding and prices are amongst the cheapest online.
When you have your domain, you’ll need to update DNS settings and add it to your web hosting account. Your web host will have a tutorial on how to add a domain.
Upon completion, follow the steps below to change WordPress URL.
1. Backup Your WordPress Website
The first step is to backup your WordPress site.
There are lots of backup plugins available in the WordPress repository, but the one I’m going to show you will backup and clone your site to the new domain.
It’s called ManageWP and for just two dollars it will save you a ton of time and it’s easy to use for non-techie WordPress users.
In my experience, it is the safest, fastest, and easiest way to change WordPress URL.
Let’s start by installing and activating the WordPress plugin. If needed, see my guide on how to install WordPress plugins step by step.
Once activated, there’s nothing more you need to do with the plugin, yet.
Stay logged in to WordPress admin and leave the page open. In a new browser window visit www.ManageWP.com
Enter your email address. Click the ‘Sign Up’ button.

Enter your first name. Click Next.
Then enter your surname. Click Next.
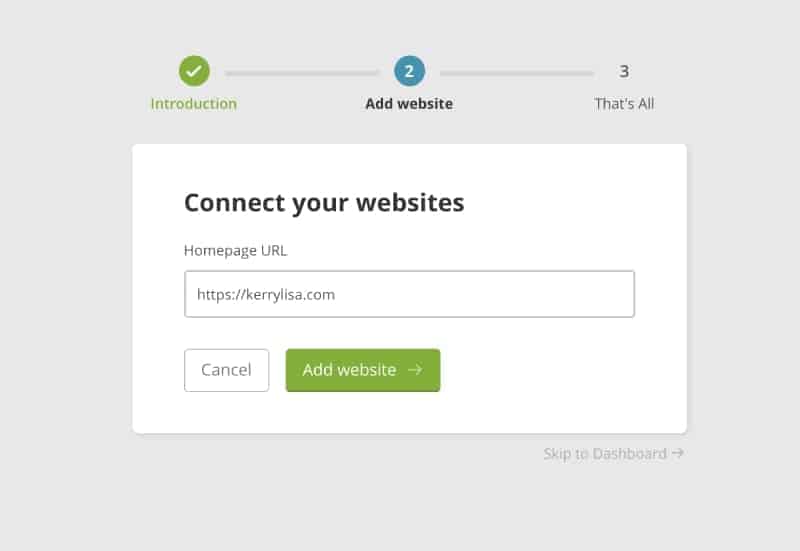
Enter your website URL. Click Add Website.
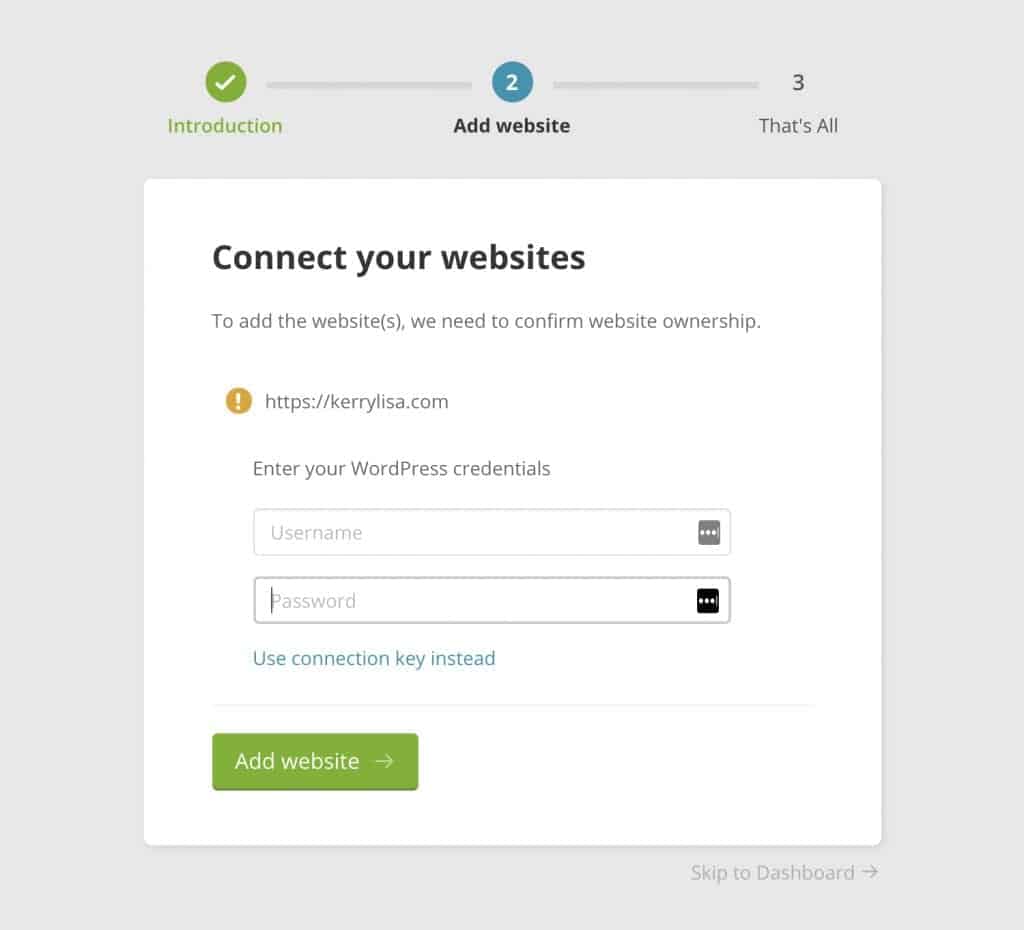
Do NOT enter your username and password on the next screen.
We’re going to use a connection key instead.
Leave ManageWP open. Go back to your WordPress admin area.
You should already be on the plugins page. If not go to Plugins >> Installed Plugins.
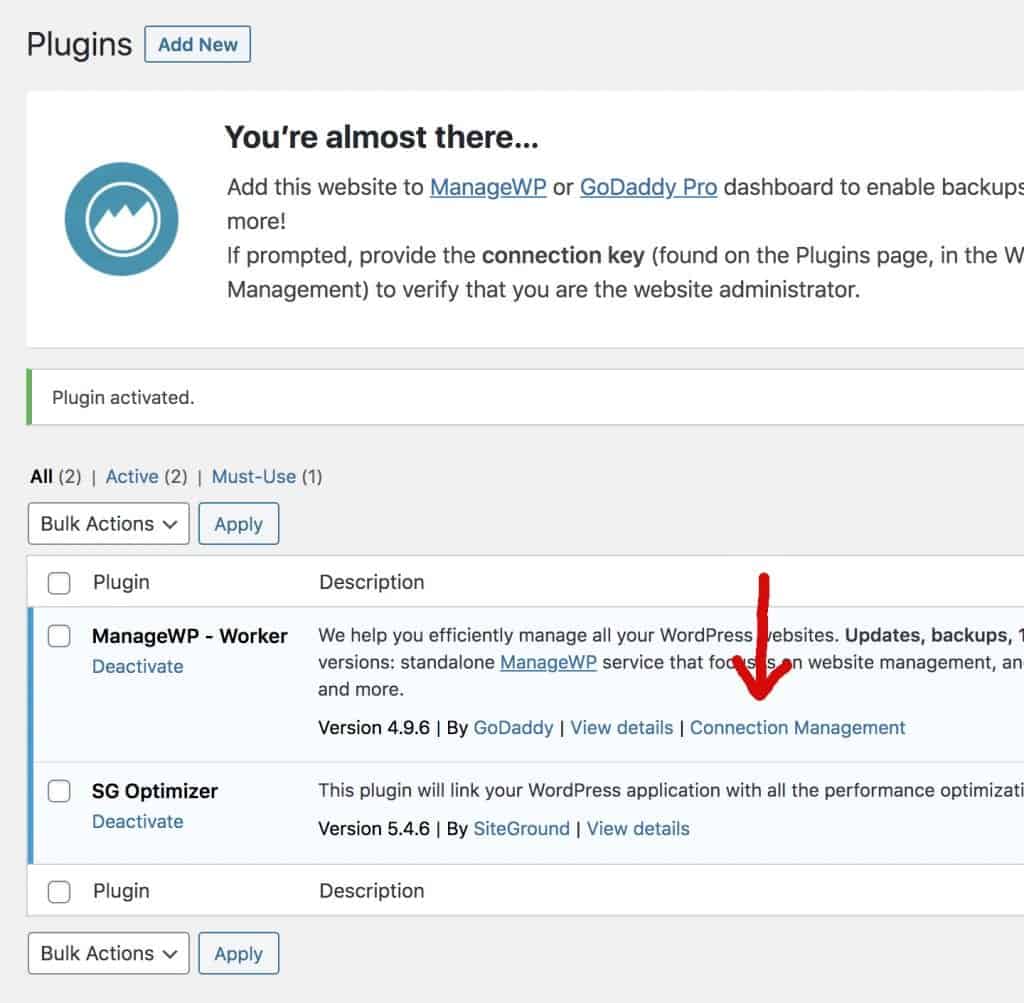
Scroll down to the ManageWP Worker plugin.
Click the ‘Connection Management’ link.
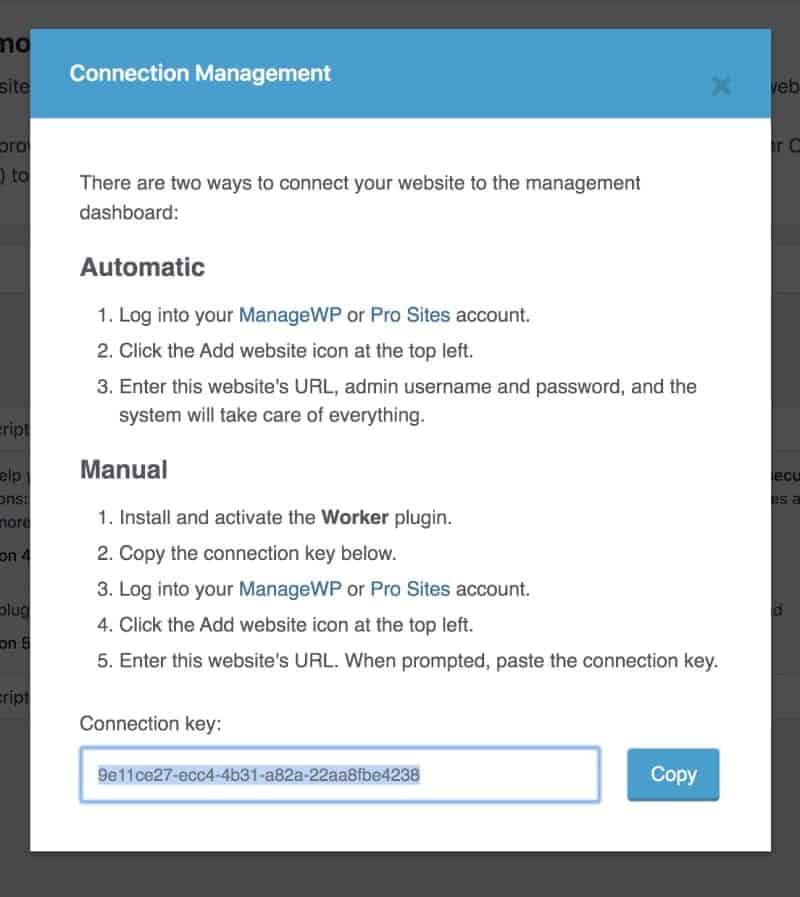
Copy the connection key.
Go back to ManageWP.
Click the ‘Use Connection Key Instead’ link.
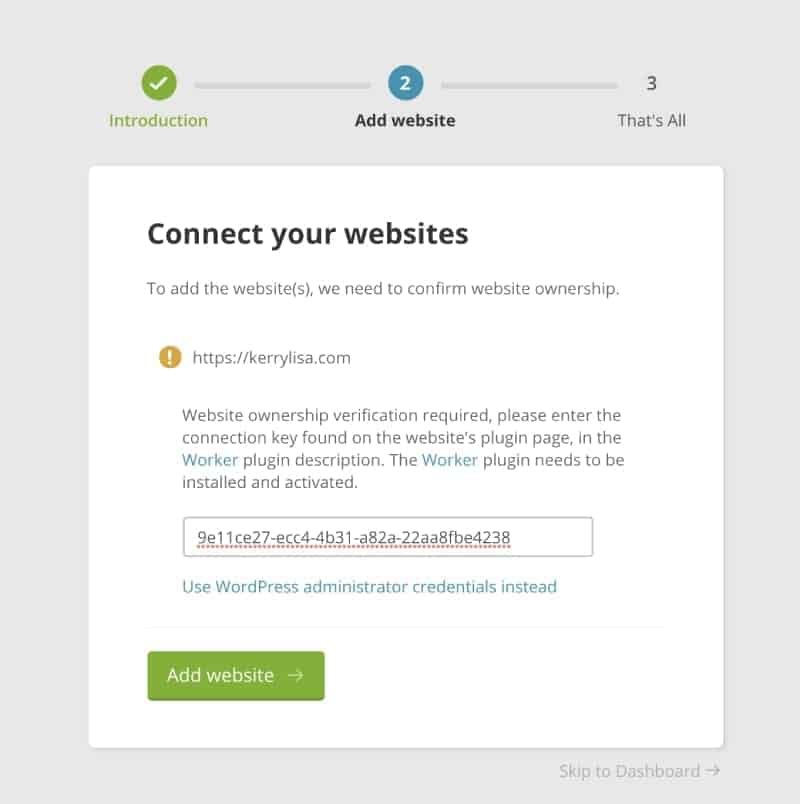
Paste in the connection key. Click Add Website.
Wait a minute or two and you’ll see a success message.
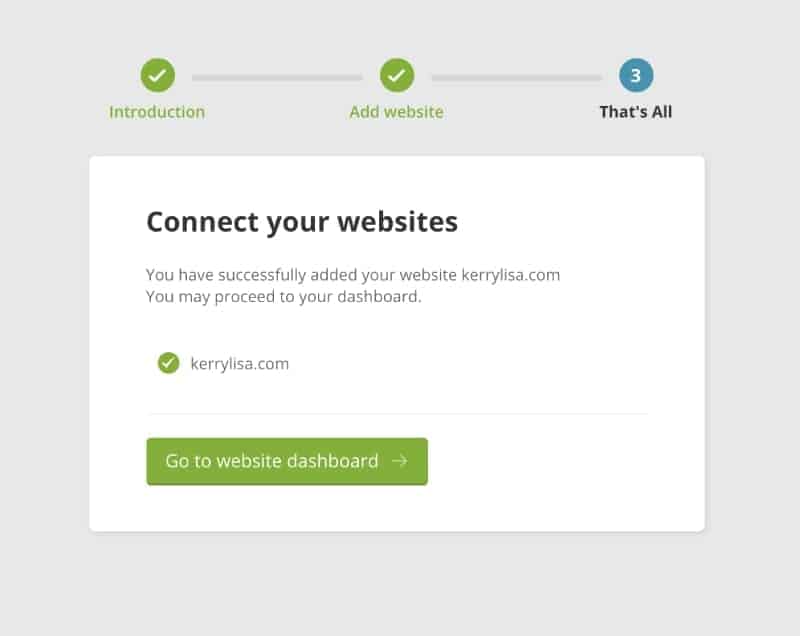
Go to Website Dashboard.
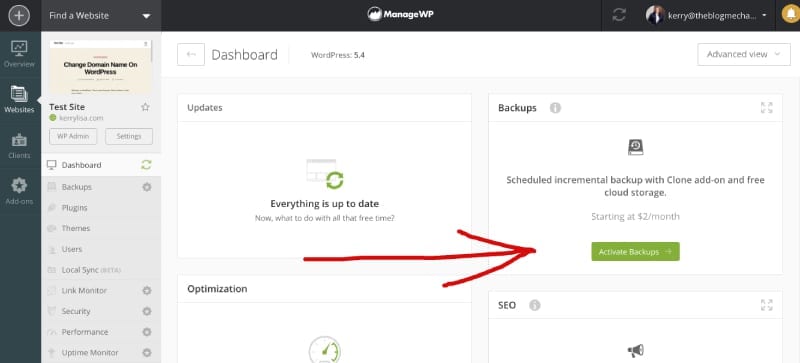
Activate backups.
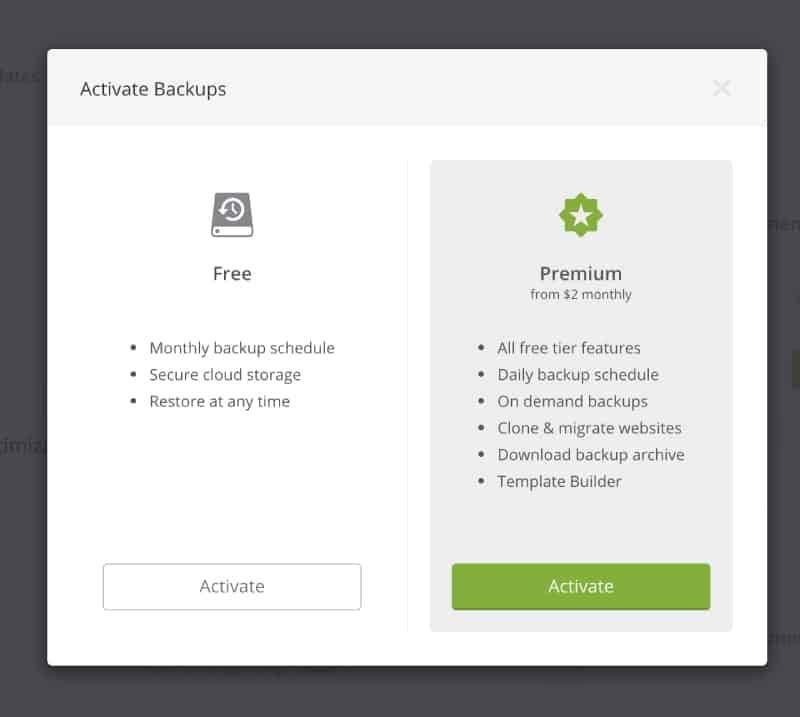
You have two options:
- Free backups
- Premium backups
Choose premium backups. You need it to complete the upcoming steps.
Click Activate >> Activate Add-on
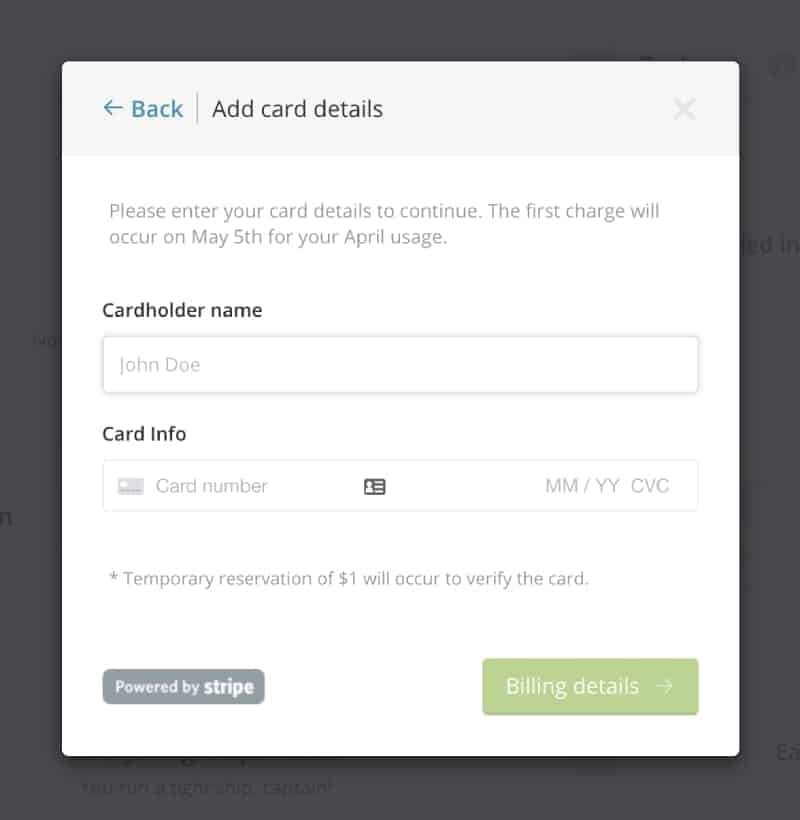
Enter your card details and follow the prompts.
ManageWP will now backup your WordPress website and store it on their encrypted servers at Amazon s3.
While you’re waiting for the backup process to finish, let’s move on to step two.
2. Create a Database For the New Domain
Before you can clone a copy of your WordPress website on the new domain name, you’ll need to create a new database.
Log in to your web hosting cPanel account. In most cases, that will be at your domain name followed by forward slash cpanel, like this: theblogmechaic.com/cpanel
If you don’t know your cPanel username and password, contact your web hosting provider for help.
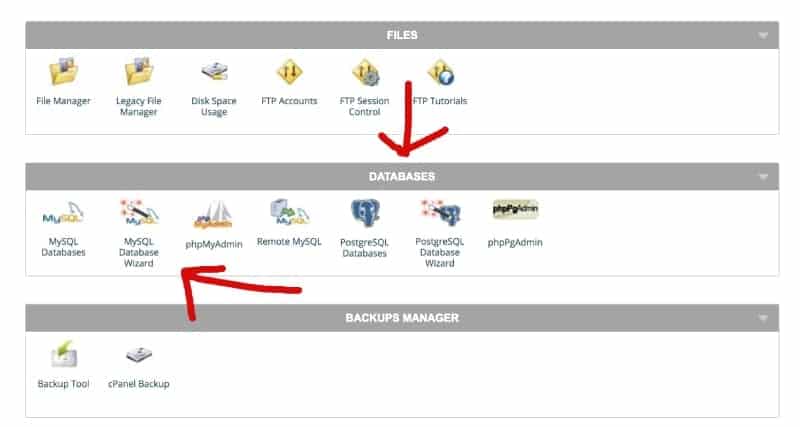
Once logged in to cPanel, scroll down to the ‘Databases’ section and click the ‘MySQL Database Wizard’ icon.
Give your WordPress database a name. Five letters work best. Click Next Step.

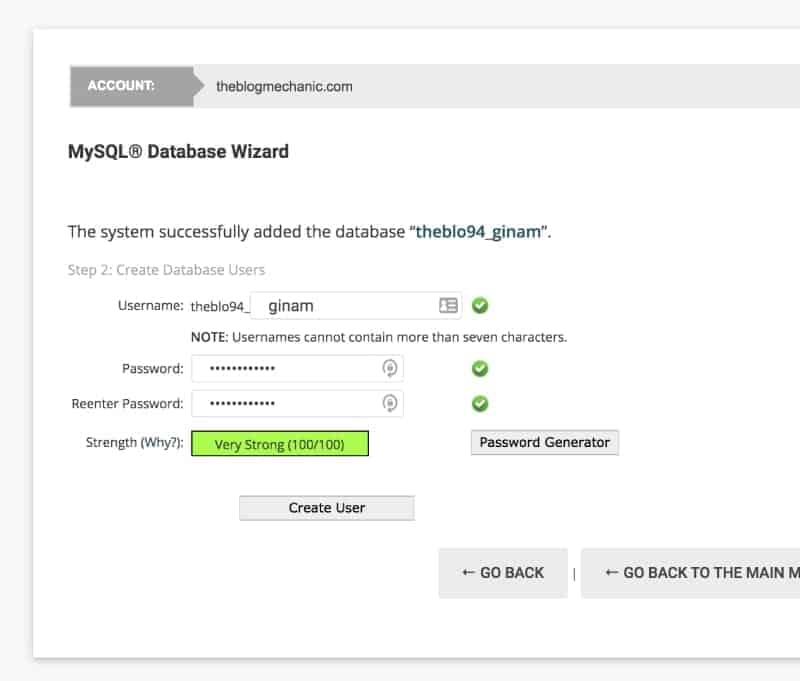
Enter a database username. Again, five characters work best.
Click ‘Password Generator’ to set a strong password.
Make sure you write the password down or copy and paste it on a notepad document. You’ll need it in the next step.
Upon completion, click Create User.
On the next page, copy the database information and add it to the notepad document with the password.
Select ‘All Privileges’. Click Next Step.
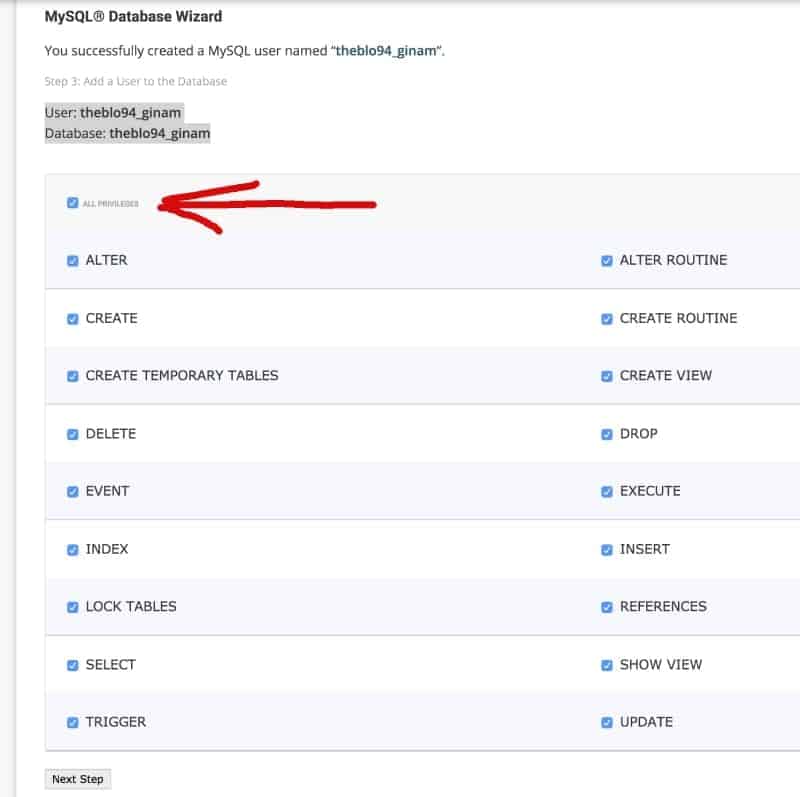
And that’s it! You have successfully created a new database.
ManageWP should have finished backing up your WordPress site now.
Let’s continue.
3. Clone WordPress Site to New Domain Name
To restore the backup on your new domain name we will use the clone feature in ManageWP.
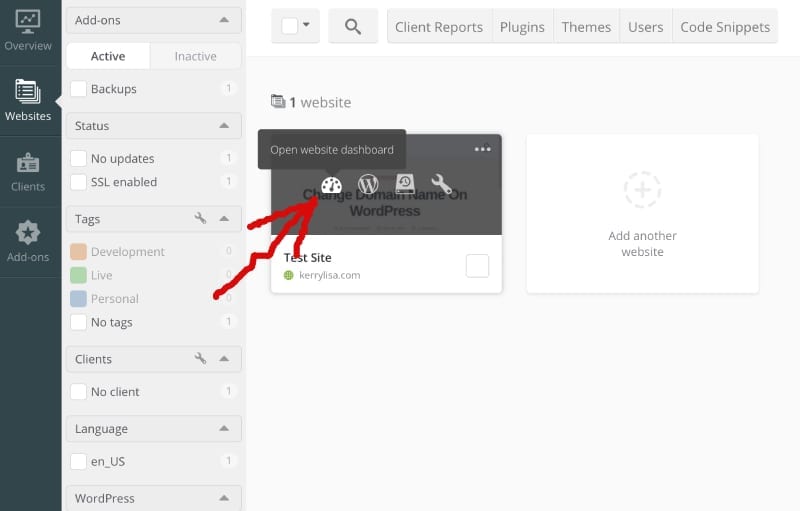
Login to your ManageWP account.
Click the ‘dashboard icon’ to open up your website dashboard.
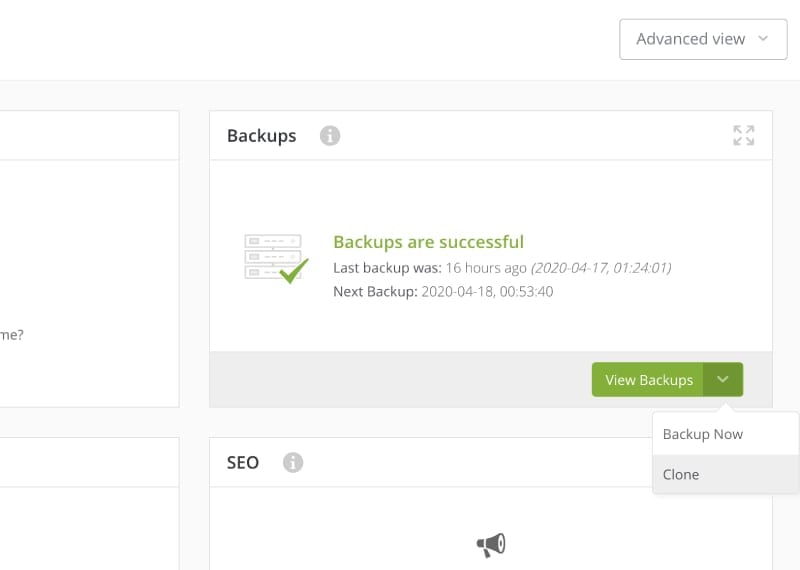
Click View Backups >> Clone.
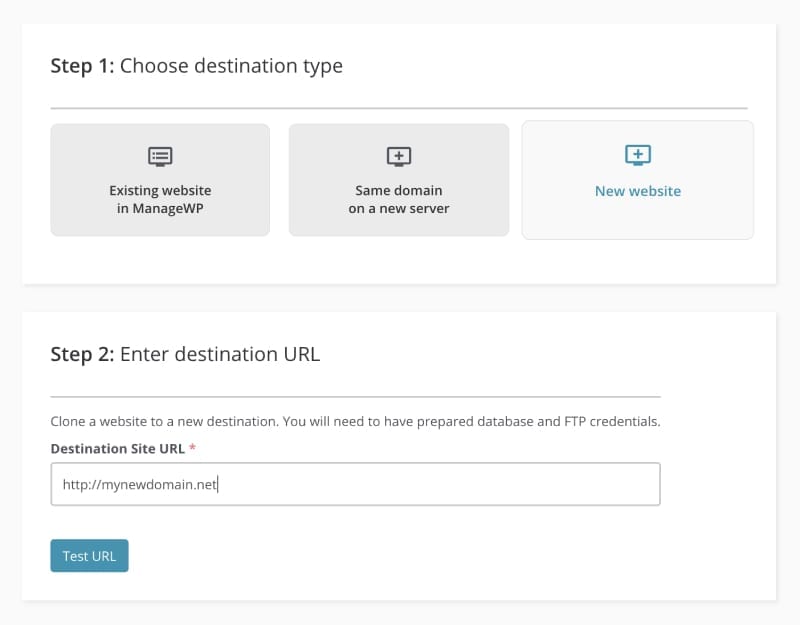
Choose ‘New Website’ as the destination.
Enter your WordPress address URL as the ‘Destination Site URL’ and click the ‘Test URL’ button.
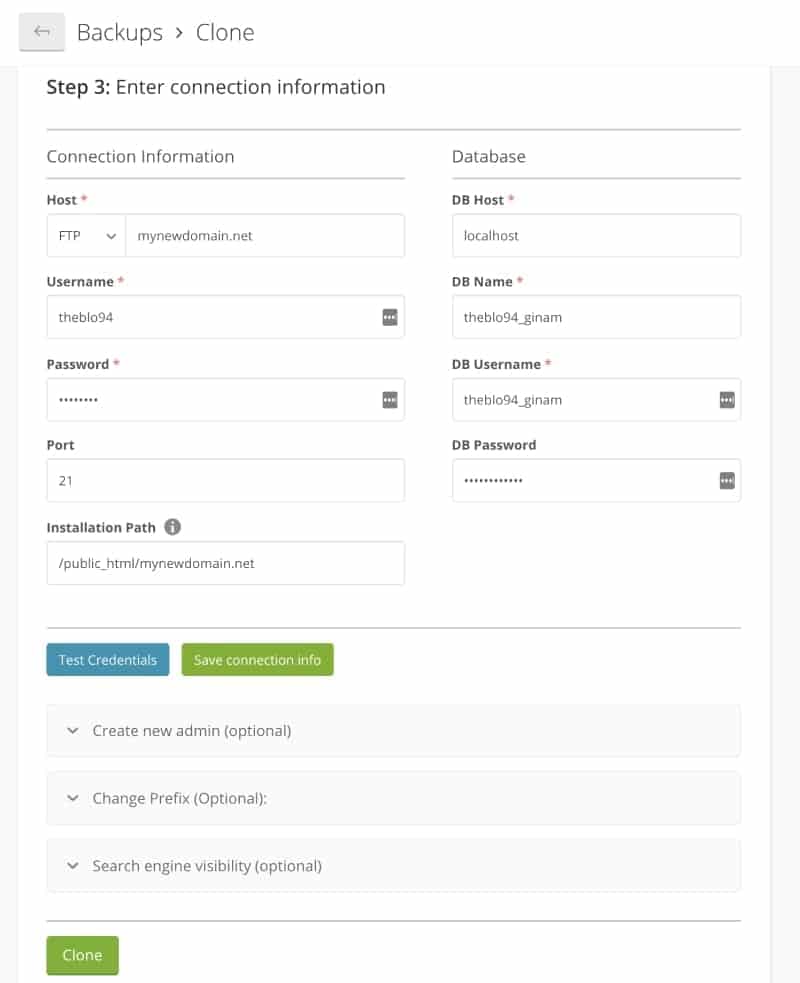
Your FTP host information will be prefilled for you.
Enter your FTP username and password. This is usually the same as your cPanel credentials. If you’re unsure, contact your hosting provider for help.
Leave the Port as 21 and enter an Installation path. This will likely be similar to mine as seen in the screenshot below. Just change my domain name to yours.
Now copy and paste the database information that you saved in the previous step. Once done, click ‘Test Connection’.
Assuming the test is successful, click the ‘Save Connection Info’ button to continue. Click Clone.
To complete the process, you’ll see a message asking you to confirm. Click Clone.
ManageWP will now use the backup made in step one to clone your WordPress website on your new domain name.
Depending on the size of your site, the process may take several minutes. Grab yourself a drink while you wait.
When it’s done, you will see a success message.

Congratulations! You have successfully moved your WordPress website to a new domain name.
But you’re not finished yet!
We need to set up a 301 redirect from the old WordPress address URL to the new site address URL.
This is important for SEO and readers because:
- Links to your site in search results will still be pointing to your old website address.
- Returning visitors don’t yet know about the domain change, so they will go to your old site address, too.
Setting up a 301 redirect will automatically send users and search engines to your new website address URL.
First though, ManageWP bills on a monthly recurring basis. Make sure you deactivate premium backups if you no longer want to use the plugin.
4. Setup a 301 Redirect
To set up a 301 redirect, you need to edit the .htaccess file on your old WordPress website using file manager or FTP.
In this tutorial, we will use file manager.
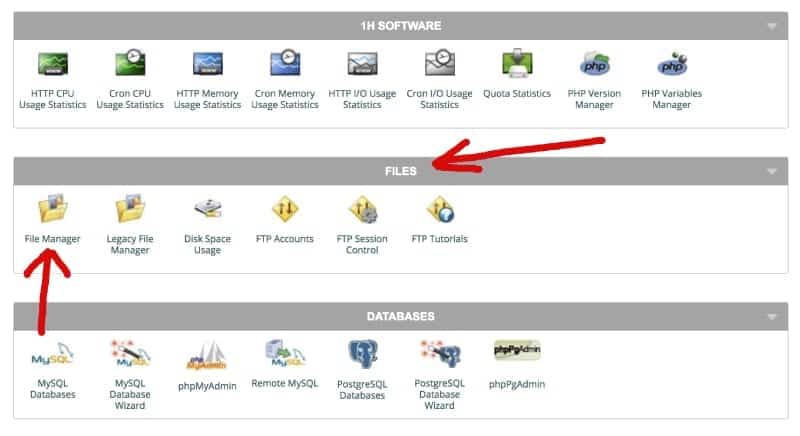
Login to cPanel and this time scroll down to the ‘Files’ section.
Click the ‘File Manager’ icon.
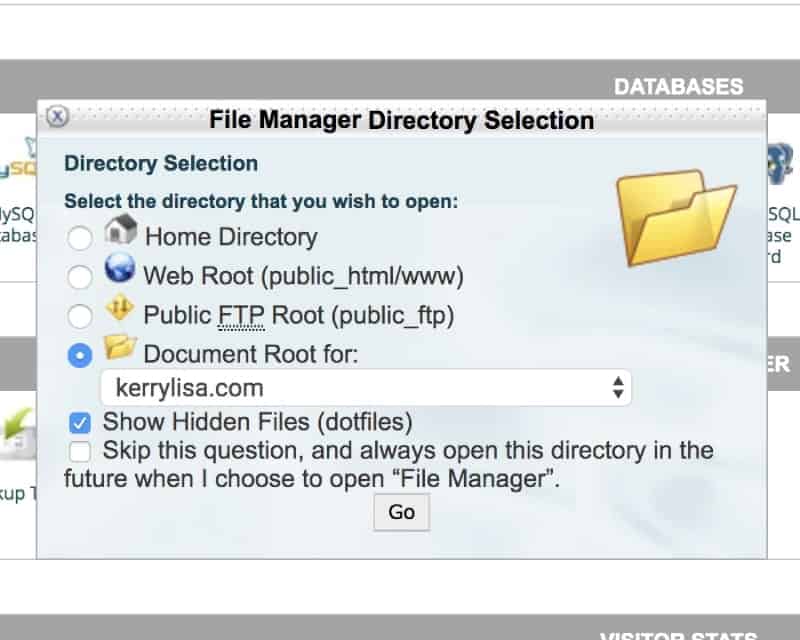
Select your old site address URL as the document root and make sure ‘Show Hidden Files’ is checked.
Open up the .htaccess file with the Code Editor.
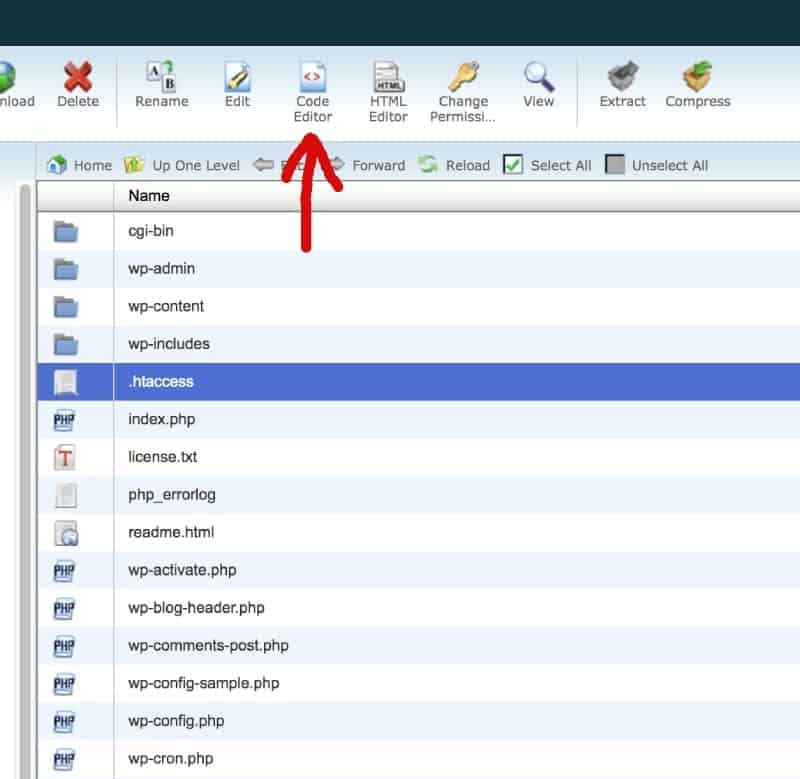
Paste the following code at the very top and change kerrylisa.com with your new domain.
#Options +FollowSymLinks
RewriteEngine on
RewriteRule ^(.*)$ http://www.kerrylisa.com/$1 [R=301,L]
When you visit your old domain it should automatically redirect to the new one.
All that’s left to do now is tell Google about the change.
5. Tell Google About The Domain Change
To let Google know about the domain change you need to do a change of address inside Google Search Console.
Doing this will help Google quickly find your new domain and show it in the search results.
If you don’t already have a Google Search Console account, create one. Add both domains and verify them.
If you do already have an account for your old domain, add a new property for the new domain and verify it.
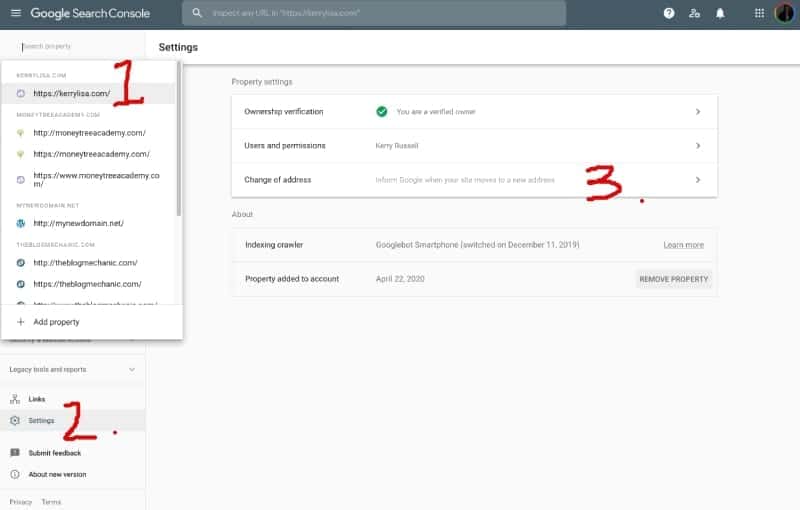
Then, in the left sidebar
- Select your old WordPress URL
- Click the Settings tab
And to the right of the screen
- Select Change of Address
On the next screen
- Choose your old WordPress URL
- Click the ‘Validate & Update’ button
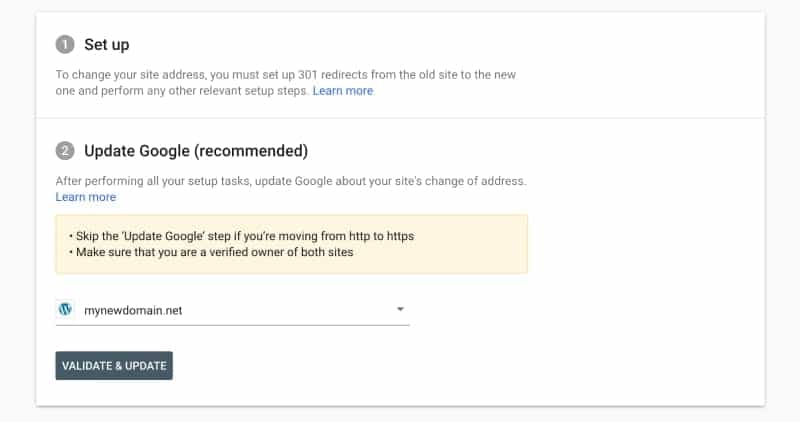
Finally, Google Search Console will perform a quick validation test and process your request if no errors are found.
I hope this tutorial has helped you learn how to change WordPress domain name. If you have any questions, let me know in the comments box below.