How To Add Social Media Icons To WordPress Header Menus
If you want to add social media icons to the header (or the footer) of your WordPress website, keep reading.
While some WordPress themes like Divi and Avada make this a simple task to achieve through the theme settings, most themes don’t. In which case, a good workaround is to add social media icons to WordPress header menus instead.
In this tutorial, I will show you how to add social media icons to WordPress header menus, step by step. But first …
It’s worth taking a look at the theme customizer on your WordPress website to see if you are able to add the icons using the customizer, or not.
Adding Social Media Icons To WordPress Header Using The Theme Customizer
To check the theme customizer, go to Appearance >> Customize and look for a tab named header or something similar.
In this example I am using the Divi theme which I highly recommend btw IF you’re looking for a theme that’s easy to make changes to yourself.
In the Divi theme customizer the tab is called header & navigation. And as you can see, there’s a footer tab, too.
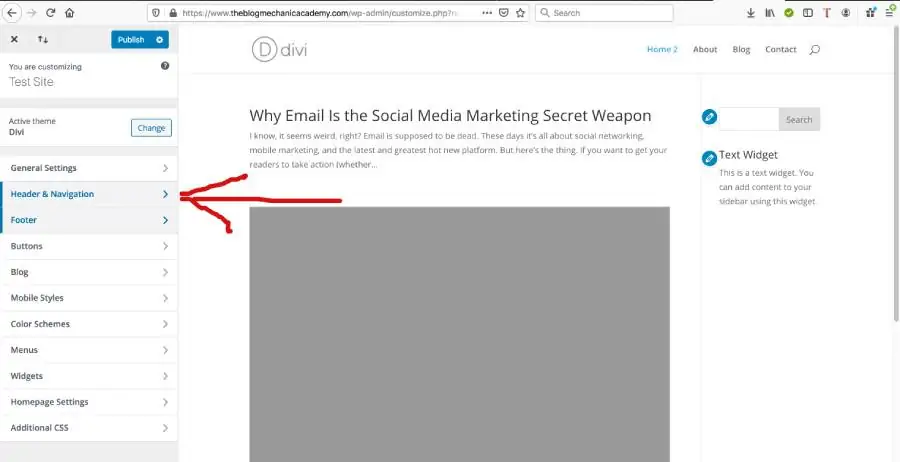
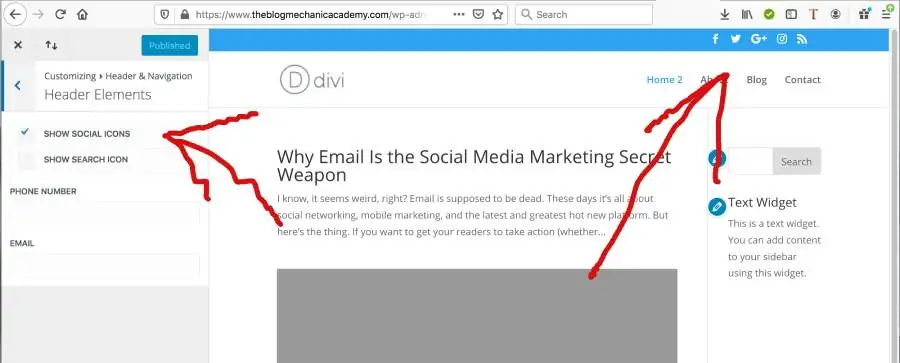
To add social media icons to this theme, you click Header & Navigation >> Header Elements >> Show Social Icons.
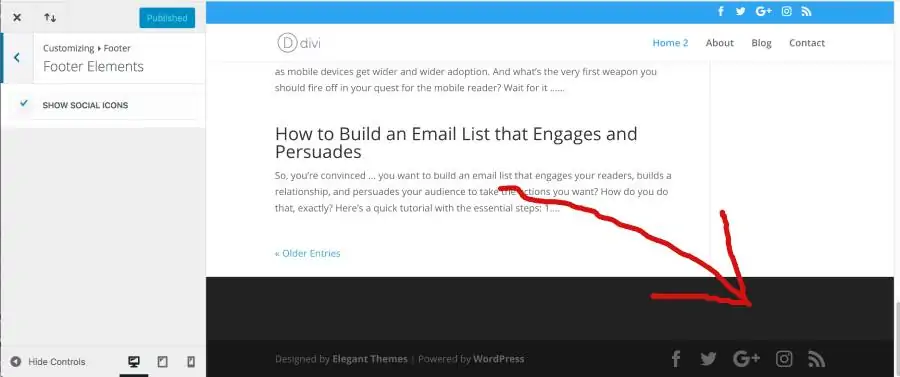
To add social media icons to the footer of Divi go to Footer >> Footer Elements >> Show Social Icons. And voila. The icons have been added.
Easy, right?
If your theme has a header and footer tab, it’s possible you may be able to use the theme customizer. But if not, you can easily add social icons to WordPress Menus within the header and footer area of your site.
The advantage of using WordPress menus is that you don’t have to know code like HTML and CSS, or make edits to theme templates files that can easily break your site.
And, should you wish to do so, you can change the order of the social icons and add new ones anytime using a simple drag and drop interface.
How To Add Social Media Icons To WordPress Menus In The Header
The first thing you need to do is install and activate the Font Awesome plugin. For more details, see my guide on how to install a WordPress plugin.
Once activated, there’s nothing more you need to do with the plugin. You can install it and forget about it.
For now, just open up the official Font Awesome website in a new window so you can easily switch between it and your WordPress admin area.

We are using Font Awesome to add social icons to your site because compared to static images, vector images are small, they load fast, and they scale to any size without loss of quality – and it’s free.
So. With your WordPress admin open in one window and Font Awesome open in another, in WordPress go to Appearance >> Menus and select the menu you want to add the icons to.
In this example, I am using the Authority Pro theme from StudioPress, and I am adding social icons to the header area. So, I have chosen the header menu.

With your menu selected, now switch to the Font Awesome website but don’t close WordPress, you need to go back to it in a minute.
On the Font Awesome homepage, click Icons in the top navigation menu and search for Facebook, or Twitter, or Pinterest – whichever social icon you are looking for. I searched for Facebook.
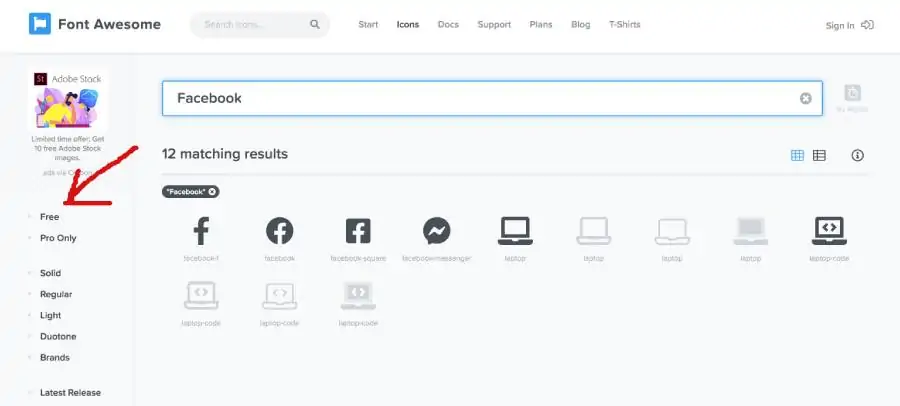
As seen in the image above, that will bring up all the icons that match the keyword you entered into the Font Awesome search – but they are not all free. To see free icons only, select ‘Free’ from the left side navigation menu.
Next, decide which icon you are going to use and click on it. You’ll be taken to a new page that has a code snippet for you to copy.

Hover over and click the HTML code to copy it. Then, switch back to your WordPress admin area to the menus page – exactly where you was before switching to Font Awesome. Same place as the image below.

Next, where it says Add Menu Items, select Custom Links and paste the HTML code you just copied into the Link Text input field. Enter your social profile url, and click Add To Menu.

After that, the custom link will be added to the bottom of the menu you have chosen. Simply repeat the steps until you’ve added as many icons as you need and click Save Menu to save your changes.
Then, visit your site to see the social media icons in the WordPress header or footer – wherever you added them.

You can also use Font Awesome to add social media icons to your sidebar and any other widget area on your site, but you will need some basic CSS knowledge for that.
Conclusion
And that’s it! I hope this article has helped. You have learned:
- How to add social media icons to WordPress header
- How to add social media icons to WordPress footer
- How to add social media icons to WordPress menus
